

Hi, I’m Kim — the knitter and designer behind M1R KNIT. I teach the Norwegian knitting method through clear tutorials, modern patterns, and simple techniques designed to help you knit with more confidence and comfort.
How to Knit Magic Loop: A Beginner-Friendly Knitting Tutorial
If you've ever wanted to knit socks, sleeves, mittens, or beanies without using double-pointed needles, the magic loop method might become your new favourite way to knit in the round.
Magic loop is one of my most-used knitting techniques. I use it for almost everything that requires knitting a small circumference, particularly socks. I find it comfortable, versatile, and much easier on my hands than working with small 9-inch circular needles or DPNs (double pointed needles).
In today's tutorial, I'm showing you exactly how I knit using magic loop, including how to arrange your stitches, join in the round, switch between needles, and maintain even tension to prevent those frustrating gaps known as ladders.
I'm demonstrating the technique while starting a pair of socks, but the same method can be used for all kinds of projects.
Watch the full magic loop knitting tutorial below.
What Is Magic Loop Knitting?
Magic loop is a technique that allows you to knit small circumferences using one long circular knitting needle.
Instead of distributing your stitches across several double-pointed needles (DPNs), you divide them into two sections and use the flexible cable of your circular needle to hold the stitches you're not currently knitting.
The result is a simple way to knit smaller projects without constantly switching between multiple separate needles.
You can use magic loop for:
Socks and sock toes
Sleeves and cuffs
Beanies and hat crowns
Mittens and thumbs
Other small, tubular knitting projects
I also knit using the Norwegian knitting method, but magic loop works just as well with English, Continental, or other knitting styles.
What You'll Need
You don't need any special equipment to get started with magic loop.
All you need is your yarn, a long circular knitting needle in the appropriate size for your project, and a little patience while you get comfortable moving your stitches around.
My needle preference: I use ChiaoGoo circular needles with their flexible red cables. I particularly love these for knitting socks because the cables are flexible and easy to maneuver.
Extra Tip: Choose the Right Cable Length
One thing I didn't cover in the video is how much difference your needle length can make.
For most magic loop projects, I recommend starting with a circular needle that's approximately 32–40 inches (80–100 cm) long, measured from needle tip to needle tip.
A 40-inch needle can be particularly helpful when you're first learning because it provides plenty of cable to work with.
The cable should be flexible enough to bend comfortably without pulling your stitches apart.
A cable that's too short or stiff can make magic loop unnecessarily frustrating and may contribute to uneven tension at the points where your stitches are divided.
SHOP MY AMAZON FAVESHow to Knit Using Magic Loop
Step 1: Cast On and Divide Your Stitches
Start by casting on the number of stitches required for your project.
In my video, I'm using the long-tail cast-on to begin a pair of socks but you can also use the Old Norwegian CO (aka German Twisted CO).
For traditional sock knitting, I like to divide my stitches evenly between the front and back needles. For sleeves, beanies etc you dont need to do that.
For example, if you've cast on 64 stitches, you'll have 32 stitches on each side.
Once you've found the halfway point, gently pull a loop of cable between the stitches, creating two sections.
Make sure your stitches aren't twisted before you join in the round.
Step 2: Position Your Needles and Join in the Round
With your needle tips parallel and pointing in the same direction, make sure your working yarn is coming from the back needle.
Pull the back needle out, allowing those stitches to rest on the cable.
You can now use that free needle tip to begin knitting the stitches on your front needle.
Work the first stitch according to your pattern to join in the round.
In my tutorial, I'm working a simple 2x2 ribbing, but you can use the same magic loop technique for stockinette, textured stitches, or colourwork.
Step 3: Maintain Even Tension
This is one of the most important parts of magic loop knitting.
When you begin knitting across a new section, pay close attention to your first couple of stitches.
I like to snug the first stitch against the cable and maintain consistent tension while working the second stitch.
This helps prevent ladders, those loose vertical gaps that can appear where you switch between needles.
Step 4: Switch Your Needles
Once you've finished knitting the stitches on your front needle, it's time to switch.
Reposition your work so the unworked stitches are ready to move onto the front needle.
Pull your cable through, slide those stitches up onto the needle, and use the free needle tip to begin knitting again.
Continue working across your second section.
Once you've knitted both sections, you've completed one full round.
Repeat this process for the remainder of your project.
6 Extra Tips for Better Magic Loop Knitting
These are a few additional things worth knowing, especially if you're new to the technique.
1. Don't Pull Your First Stitch Too Tight
Although maintaining tension is important, there's a difference between snugging a stitch and pulling it excessively tight.
If you pull too hard on your working yarn, you can actually distort the previous stitch resting on the cable. This sometimes creates a noticeably smaller stitch beside a loose one.
Instead, bring the stitches on either side of the gap close together and maintain even tension as you begin knitting.
A gentle adjustment after your first couple of stitches is usually better than aggressively pulling the yarn.
2. Remember That Two Sections Equal One Round
This is an easy mistake when you're first learning magic loop.
Because you're working across one group of stitches at a time, it can feel as though you've completed a round whenever you switch needles.
But you haven't!
Ie: If you've divided 64 stitches into two groups of 32, you need to work all 64 stitches before counting one completed round.
This becomes especially important when you're following instructions for increases, decreases, or textured stitch patterns.
3. Keep Track of Your Beginning of Round
One convenient thing about magic loop is that the division between your stitches can help you keep track of where you are.
When knitting socks, I often use the cast-on tail as a visual reference for the beginning of the round.
You can also attach a removable stitch marker directly to your knitting near the beginning of the round.
This is particularly helpful when you're knitting patterns with frequent round changes or shaping instructions.
Just remember that the beginning of your round isn't necessarily the same as every point where you switch needles.
4. Arrange Your Sock Stitches for Heel and Toe Shaping
When you first cast on for socks, dividing your stitches evenly is usually a convenient starting point.
As your sock progresses, however, the placement of your stitches becomes more important.
For a traditional heel-flap sock, it can be helpful to arrange your stitches so the instep stitches rest together on one section while you're working the heel stitches back and forth. Check out this pattern here: HEEL FLAP + GUSSET SOCKS 01 Knitting Pattern
Later, when working the foot and toe, having the top-of-foot and bottom-of-foot stitches organized on opposite sections makes it easier to follow your shaping instructions.
The exact arrangement depends on your sock pattern, so always follow its stitch distribution and marker placement.
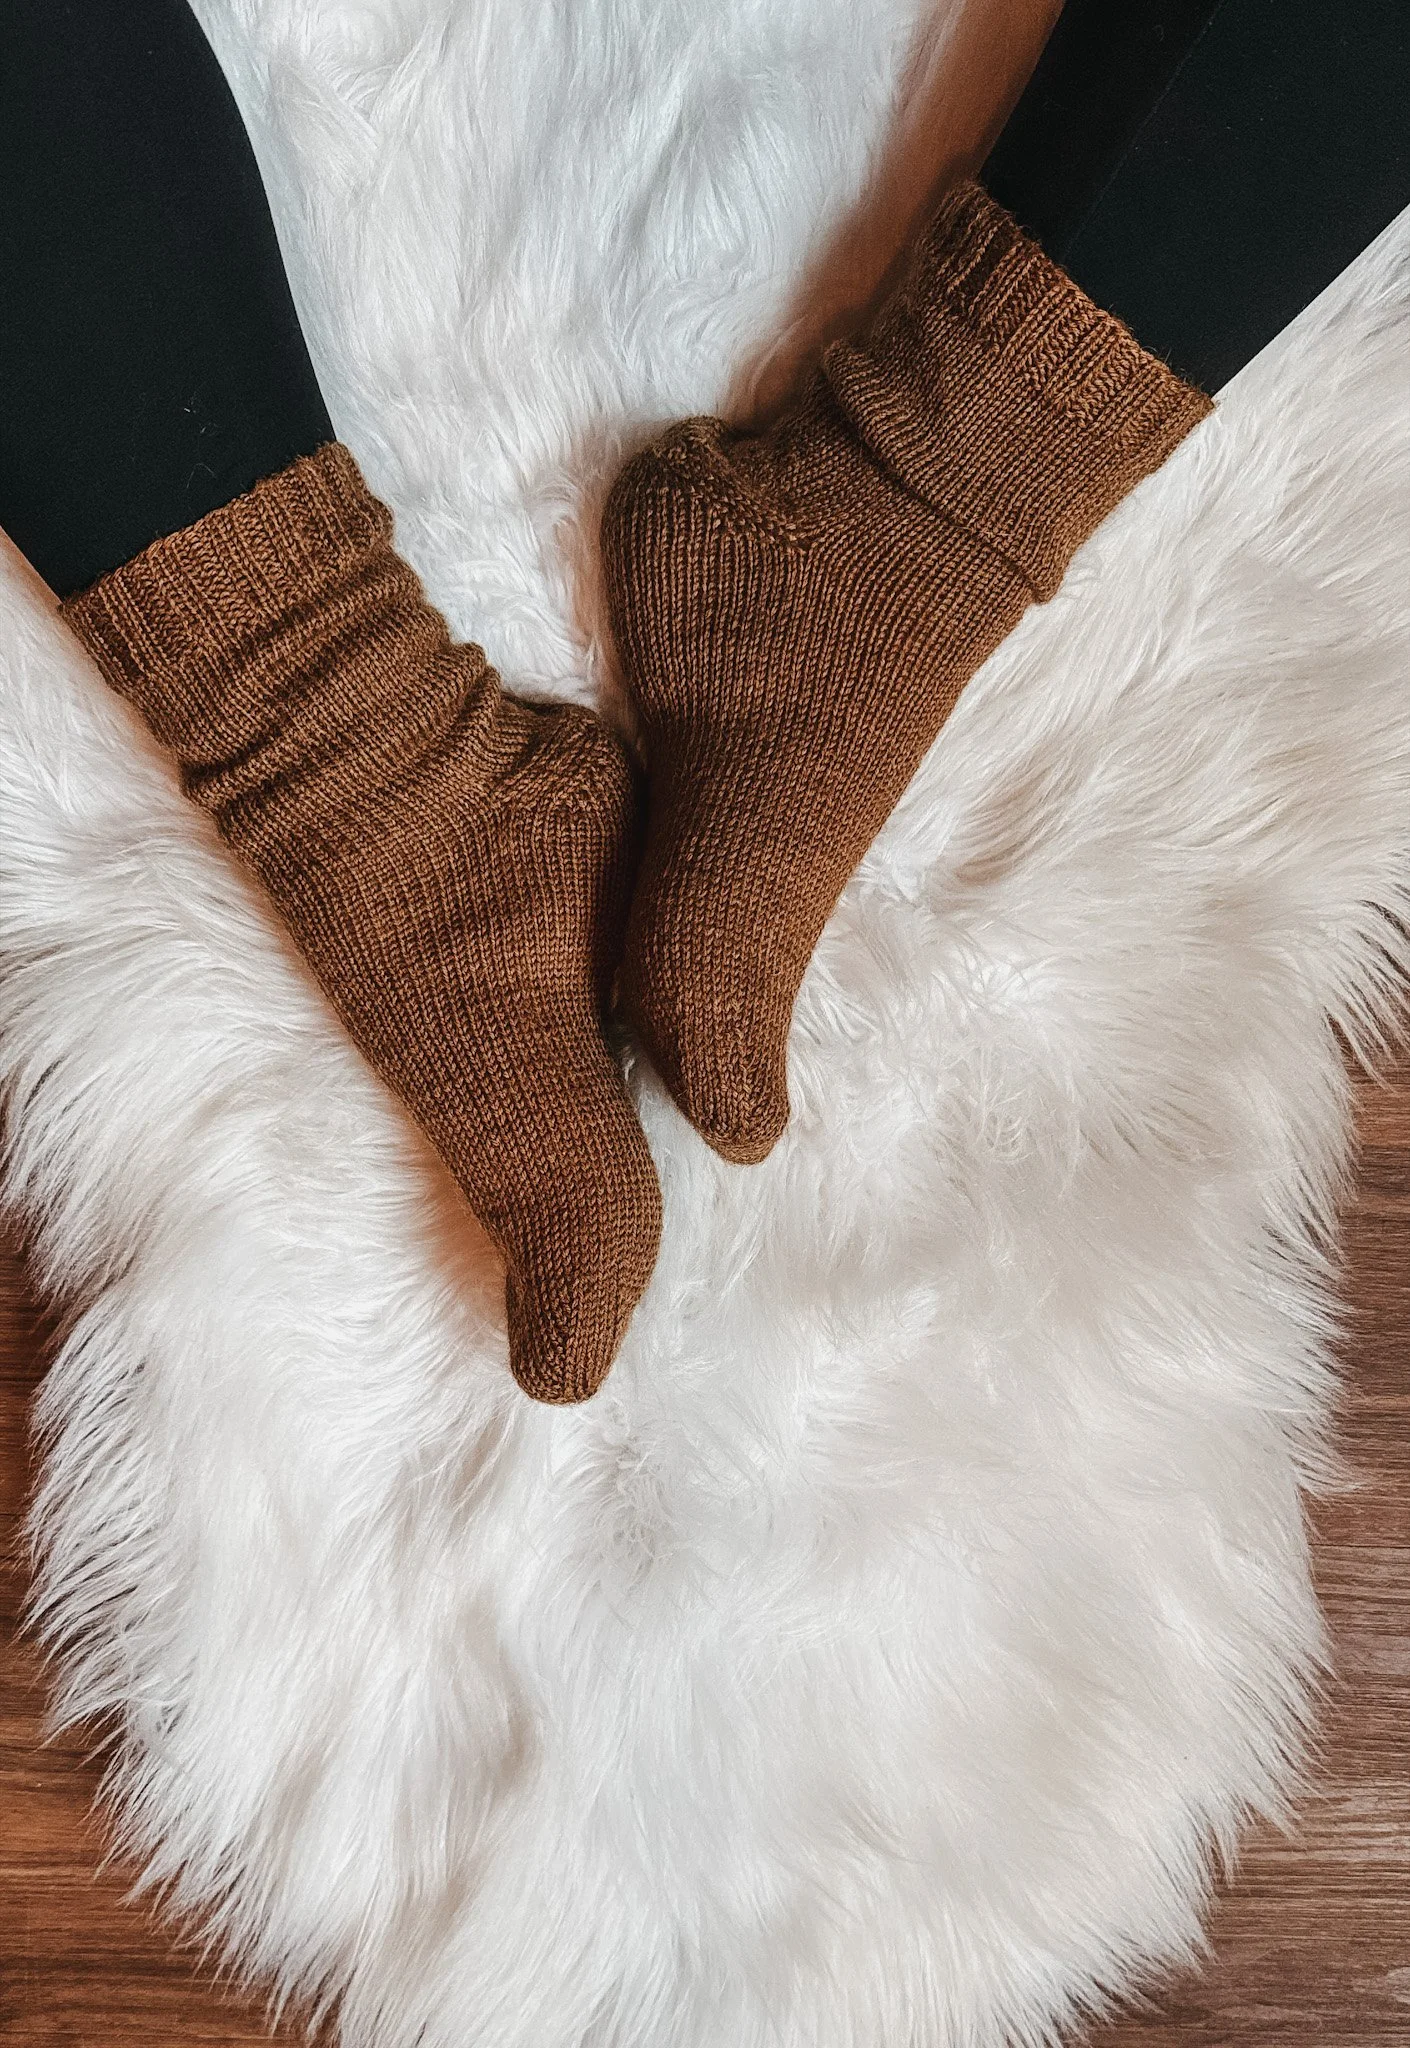
FULL SOCK KNITTING VIDEO TUTORIAL: https://m1rknit.com/tutorials/forethought-heel-socks-for-beginners
The Forethought Fingering Shortie Socks 02 Knitting Pattern is an advanced beginner pattern for knitting comfortable, everyday socks featuring a forethought heel (also known as a peasant heel), a classic ribbed cuff, and a smooth stockinette stitch fabric.
Designed with simplicity and versatility in mind, these cuff-down socks feature a 2×2 ribbed cuff, a customizable foot length, and a shaped heel and toe finished with Kitchener stitch. The forethought heel construction eliminates the need for a traditional heel flap, heel turn, and gusset, making this a wonderful introduction to sock knitting.
The downloadable PDF includes clear written instructions, three adult sizes, finished measurements, yarn requirements, gauge information, and technique guidance to help you complete your project.
A complete step-by-step video tutorial is also available to accompany the pattern. Watch it here: https://m1rknit.com/tutorials/forethought-heel-socks-for-beginners
ABOUT THE PATTERN
Forethought Fingering Shortie Socks 02 are worked from the cuff down in the round using the magic loop knitting method.
The socks begin with a 2×2 ribbed cuff, followed by a stockinette stitch leg. Contrasting waste yarn is used to mark the heel placement before continuing with the foot and toe. Once the toe is complete, the waste yarn is removed, and the forethought heel is worked using the same basic decrease construction as the toe.
Additional stitches are picked up at the sides of the heel opening to help prevent gaps and holes. Both the heel depth and foot length can be adjusted for a comfortable, personalized fit.
Pattern Type: Shortie Socks
Skill Level: Advanced Beginner
Construction: Cuff-down, worked in the round using magic loop
Heel Type: Forethought Heel / Peasant Heel
Yarn Weight: Fingering
Sizes: Adult Small, Medium, Large
SKILL LEVEL
ADVANCED BEGINNER
This pattern is suitable for knitters comfortable with:
Casting on and knitting in the round
Knit and purl stitches
2×2 ribbing
Stockinette stitch
Basic knitting decreases
The pattern also introduces picking up stitches, forethought heel construction, and Kitchener stitch grafting.
A complete video tutorial is available to help guide you through these techniques.
SIZES + FINISHED MEASUREMENTS
Sizes Included:
Adult Small (Medium, Large)
Designed to Fit Foot Circumference:
Small: Approximately 7" / 18 cm
Medium: Approximately 8" / 20.5 cm
Large: Approximately 9" / 23 cm
Finished Sock Circumference:
Small: Approximately 6¼" / 16 cm
Medium: Approximately 7⅛" / 18 cm
Large: Approximately 8" / 20.5 cm
Recommended Ease:
Approximately 10–11% negative ease around the foot for a comfortable, snug fit.
Additional Measurements:
Ribbed Cuff: 1" / 2.5 cm
Stockinette Leg: 3.5" / 9 cm
Total Leg Height: Approximately 4.5" / 11.5 cm from the cast-on edge
The foot length is customized according to your individual foot measurements. The pattern includes instructions for calculating your required foot length and adjusting the heel and toe shaping.
YARN + GAUGE
Suggested Yarn:
Filcolana Arwetta
Colour Used: #827
Yarn Weight:
Fingering Weight
50 g / 170 m per skein
Yarn Requirements:
Small: 2 skeins (100 g / 340 m)
Medium: 2 skeins (100 g / 340 m)
Large: 2 skeins (100 g / 340 m)
Yarn requirements are based on the recommended skein quantities. Actual usage may vary depending on foot length and modifications.
Suggested Yarn Substitutions:
DROPS Fabel
Lang Jawoll
Gauge:
36 stitches × 44 rounds = 4" / 10 cm in stockinette stitch, worked in the round and unblocked.
9 stitches per 1" / 2.5 cm.
Suggested Needles:
2.25 mm (US 1) circular knitting needles with a 32" / 81 cm cable for magic loop, or size needed to obtain gauge.
Notions:
Tapestry needle
Stitch markers
High-contrast waste yarn
Scissors
Measuring tape
Full yarn, needle, gauge, and notion information is included in the PDF pattern.
CONSTRUCTION + TECHNIQUES
This pattern includes the following techniques:
Long-tail cast-on
Magic loop knitting
Working in the round
2×2 ribbing
Stockinette stitch
Placing waste yarn for a forethought heel
Picking up heel stitches
Intentionally twisting additional picked-up stitches to help prevent gaps
SSK and k2tog decreases
Toe and heel shaping
Kitchener stitch grafting
Weaving in ends and blocking
NORWEGIAN KNITTING TUTORIALS
M1R KNIT specializes in teaching the Norwegian knitting method, a continental-style knitting technique with the working yarn held in the left hand.
You do not need to use the Norwegian knitting method to make this pattern.
Where helpful, the pattern includes links to M1R KNIT video tutorials demonstrating knitting techniques using the Norwegian knitting method.
FULL SOCK KNITTING VIDEO TUTORIAL
Follow along with the complete Forethought Heel Sock Knitting Tutorial, where I'll guide you through the entire process, including casting on, magic loop, sock construction, heel placement, toe decreases, picking up heel stitches, and Kitchener stitch.
Browse M1R KNIT Tutorials:
Additional Tutorials:
Learn the Norwegian Knitting Method:
https://m1rknit.com/blog/learnhowtoknit
How to Recognize, Fix & Prevent Twisted Stitches:
WHAT'S INCLUDED
✔ Complete downloadable PDF knitting pattern
✔ Step-by-step written instructions
✔ Three adult sizes: Small, Medium, Large
✔ Sizing and finished measurements
✔ Guidance for customizing foot length and heel depth
✔ Yarn requirements and substitutions
✔ Needle and notion information
✔ Gauge information and swatching guidance
✔ Pattern abbreviations and technique notes
✔ Forethought heel construction instructions
✔ Toe and heel shaping instructions
✔ Kitchener stitch grafting instructions
✔ Links to helpful M1R KNIT tutorials
✔ Complete accompanying video tutorial available online
✔ Original M1R KNIT design
DIGITAL DOWNLOAD
This listing is for a DIGITAL PDF KNITTING PATTERN ONLY.
No physical product or finished knitted socks will be shipped.
Your pattern will be available for digital download after purchase.
USAGE + COPYRIGHT
© M1R KNIT. All Rights Reserved.
This knitting pattern is protected by copyright and may not be shared, copied, reproduced, or redistributed.
Finished items made from this pattern may be sold by qualifying small businesses with annual income of $30,000 CAD or less, provided credit is given to M1R KNIT.
PATTERN SUPPORT
Questions while knitting? I'm happy to help.
Find more knitting patterns, tutorials, and technique guides from M1R KNIT.
Website: https://m1rknit.com
YouTube: @m1rknit
Instagram: @m1rknit
Ravelry: M1R KNIT
SHARE YOUR PROJECT
I'd love to see what you make!
Tag @m1rknit when sharing your finished M1R KNIT socks.
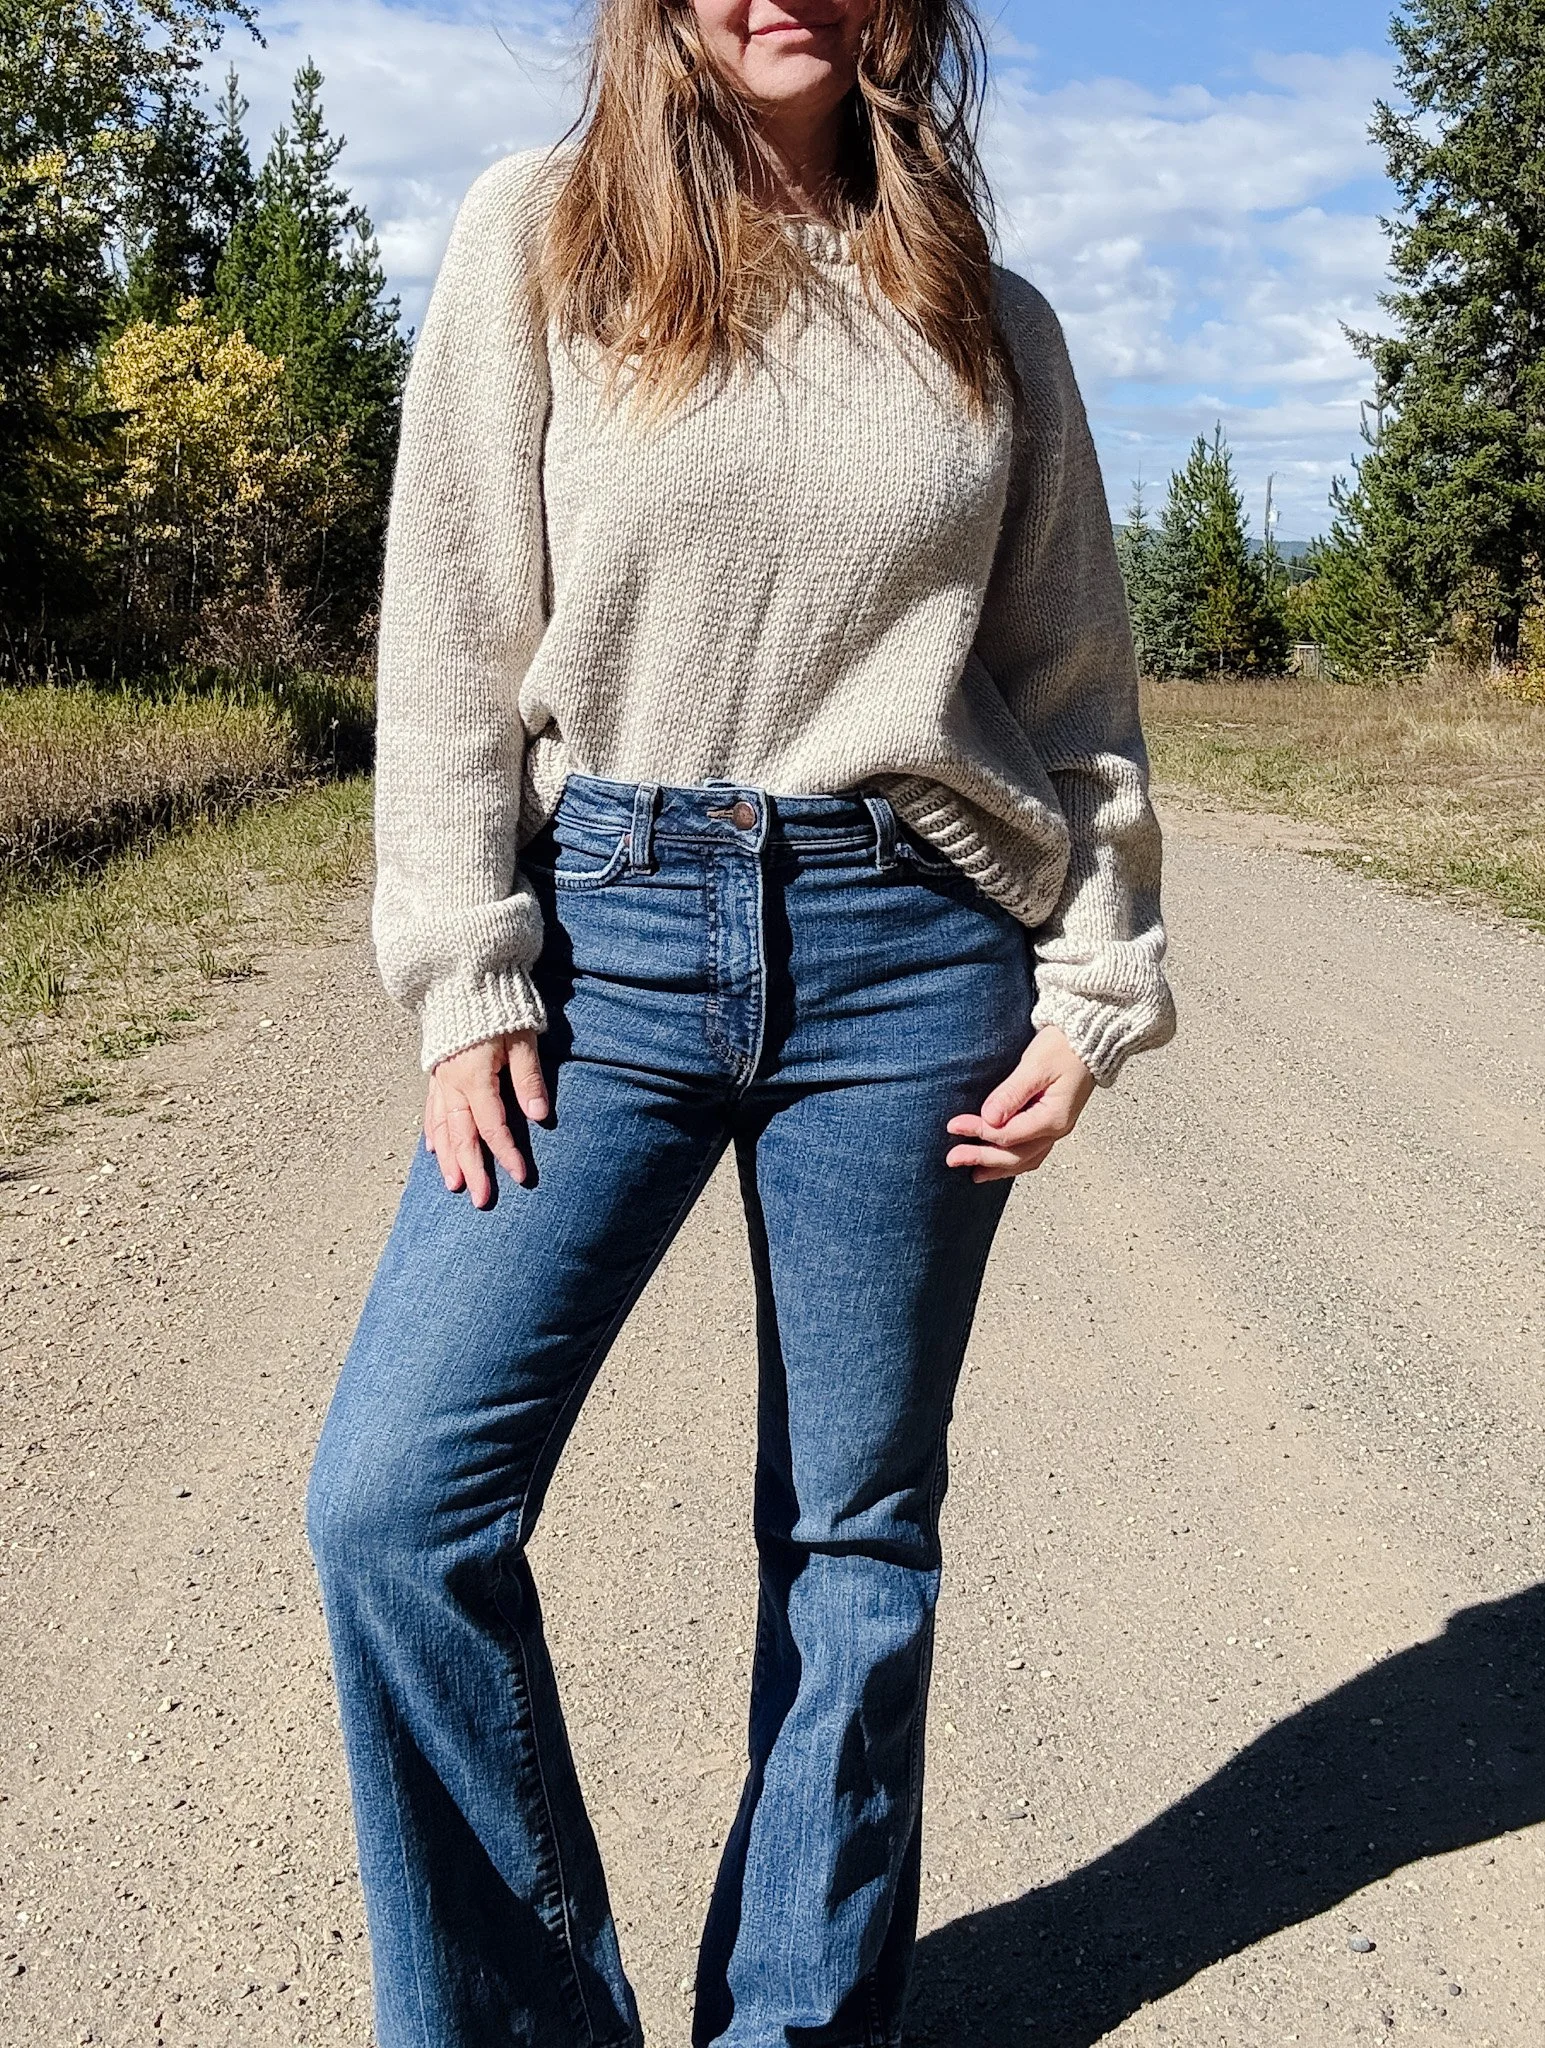
Watch the full tutorial here: https://m1rknit.com/tutorials/how-to-knit-your-first-sweater-easy-top-down-raglan-tutorial
The Basic Raglan Pullover 02 Knitting Pattern is an advanced beginner pattern for knitting a relaxed sweater featuring top-down raglan construction, a crew neckline, and long sleeves.
Smooth stockinette stitch and defined raglan lines create a simple, timeless look, finished with twisted rib at the neckline, cuffs, and hem. Approximately 6"/15 cm of positive ease gives this pullover a comfortable fit for everyday wear and layering.
The downloadable PDF includes clear written instructions, sizing and finished measurements, yarn requirements, gauge information, and technique guidance to help you complete your project.
ABOUT THE PATTERN
Basic Raglan Pullover 02 is worked from the top down in stockinette stitch. The neckline and initial raglan shaping are worked flat before joining to knit in the round.
The body and sleeves are separated at the underarms and worked individually. Twisted rib finishes the hem and cuffs, and stitches are picked up around the neckline to work the matching neckband last.
Pattern Type: Sweater / Pullover
Skill Level: Advanced Beginner
Construction: Top-down raglan; worked flat initially, then in the round
Yarn Weight: Worsted
Sizes: XS–2X
SKILL LEVEL
ADVANCED BEGINNER
The pattern include a full tutorial video here: https://m1rknit.com/tutorials/how-to-knit-your-first-sweater-easy-top-down-raglan-tutorial
This pattern is suitable for knitters comfortable with:
Knitting and purling.
Working flat and in the round.
Working raglan increases.
Picking up stitches.
Basic garment shaping.
Following detailed written instructions.
SIZES + FINISHED MEASUREMENTS
Sizes Included:
XS (S, M, L, XL, 2X)
Designed to Fit Bust Circumference:
30 (34.5, 38, 41, 45.5, 48)" / 76 (87.5, 96.5, 104, 115.5, 122) cm
Finished Bust Circumference:
36 (40.5, 44, 47, 51.5, 54)" / 91.5 (103, 112, 119.5, 131, 137) cm
Finished Full Length:
22.5 (23, 23.5, 23.5, 24, 24)" / 57 (58.5, 59.5, 59.5, 61, 61) cm
Sleeve Length from Underarm, Including Cuff:
18"/45.5 cm in all sizes.
Recommended Ease:
Approximately 6"/15 cm of positive ease.
Choose your size by comparing your bust measurement with the finished sweater measurements and allowing for your preferred fit. Additional measurements are included in the pattern schematic.
YARN + GAUGE
Suggested Yarn:
Lion Brand Wool-Ease in Linen
180 metres per 85 g ball
Yarn Weight:
Worsted
Approximate Yarn Requirements:
XS: 1,039 yards / 950 metres — 6 balls.
S: 1,176 yards / 1,075 metres — 6 balls.
M: 1,264 yards / 1,156 metres — 7 balls.
L: 1,373 yards / 1,255 metres — 7 balls.
XL: 1,531 yards / 1,400 metres — 8 balls.
2X: 1,619 yards / 1,480 metres — 9 balls.
Ball quantities refer to the suggested yarn.
Gauge:
18 stitches × 24 rounds = 4"/10 cm in stockinette stitch, washed and blocked.
Suggested Needles:
5 mm / US 8 for stockinette, or size needed to obtain gauge.
4 mm / US 6 for ribbing.
Circular needles: 16"/40 cm for the collar and 32"/80 cm to 40"/100 cm for the body.
A suitable circular needle for working the sleeves using magic loop or your preferred small-circumference method.
The pattern includes swatching guidance for knitting flat, knitting the body in the round, and knitting the sleeves. Different needle sizes may be needed to maintain gauge in each area.
Notions:
Yarn needle.
Stitch markers.
Stitch holders or waste yarn.
Full yarn, needle, gauge, and notion information is included in the PDF pattern.
CONSTRUCTION + TECHNIQUES
This pattern includes the following techniques:
Stockinette stitch worked flat and in the round.
Neckline shaping with additional cast-on stitches.
M1R and M1L raglan increases.
M1RP and M1LP purl-side increases where required for the size.
Separating the body and sleeves.
Casting on underarm stitches.
Picking up stitches for the sleeves and neckband.
K2tog and SSK sleeve decreases.
1×1 twisted rib.
Stretchy bind-off.
Weaving in ends and blocking.
NORWEGIAN KNITTING TUTORIALS
M1R KNIT specializes in teaching the Norwegian knitting method, a continental-style knitting technique with the working yarn held in the left hand.
You do not need to use the Norwegian knitting method to make this pattern.
The pattern includes links to helpful M1R KNIT technique tutorials, including raglan increases and the Ruke bind-off.
Learn the Norwegian knitting method here: https://m1rknit.com/tutorials/norwegian-knitting-method-for-beginners-learn-to-knit-step-by-step
This pattern includes a full tutorial video here: https://m1rknit.com/tutorials/how-to-knit-your-first-sweater-easy-top-down-raglan-tutorial
WHAT’S INCLUDED
✔ Complete downloadable PDF knitting pattern
✔ Step-by-step written instructions
✔ Size-specific neckline and raglan shaping instructions
✔ Sizing and finished measurements
✔ Yarn requirements
✔ Needle and notion information
✔ Gauge information and swatching guidance
✔ Pattern abbreviations and technique notes
✔ Measurement schematic
✔ Links to helpful M1R KNIT technique tutorials
✔ Original M1R KNIT design
DIGITAL DOWNLOAD
This listing is for a DIGITAL PDF KNITTING PATTERN ONLY.
No physical product or finished knitted item will be shipped.
Your pattern will be available for digital download after purchase.
USAGE + COPYRIGHT
For personal, non-commercial use only.
Items made from this pattern may not be sold.
Pattern may not be shared, copied, or redistributed.
© M1R KNIT. All Rights Reserved.
PATTERN SUPPORT
Questions while knitting? I’m happy to help.
Find more knitting patterns, tutorials, and technique guides from M1R KNIT:
Website: M1RKNIT.com
YouTube: @m1rknit
Instagram: @m1rknit
Ravelry: M1R KNIT
SHARE YOUR PROJECT
I’d love to see what you make.
Tag @m1rknit when sharing your finished M1R KNIT project.
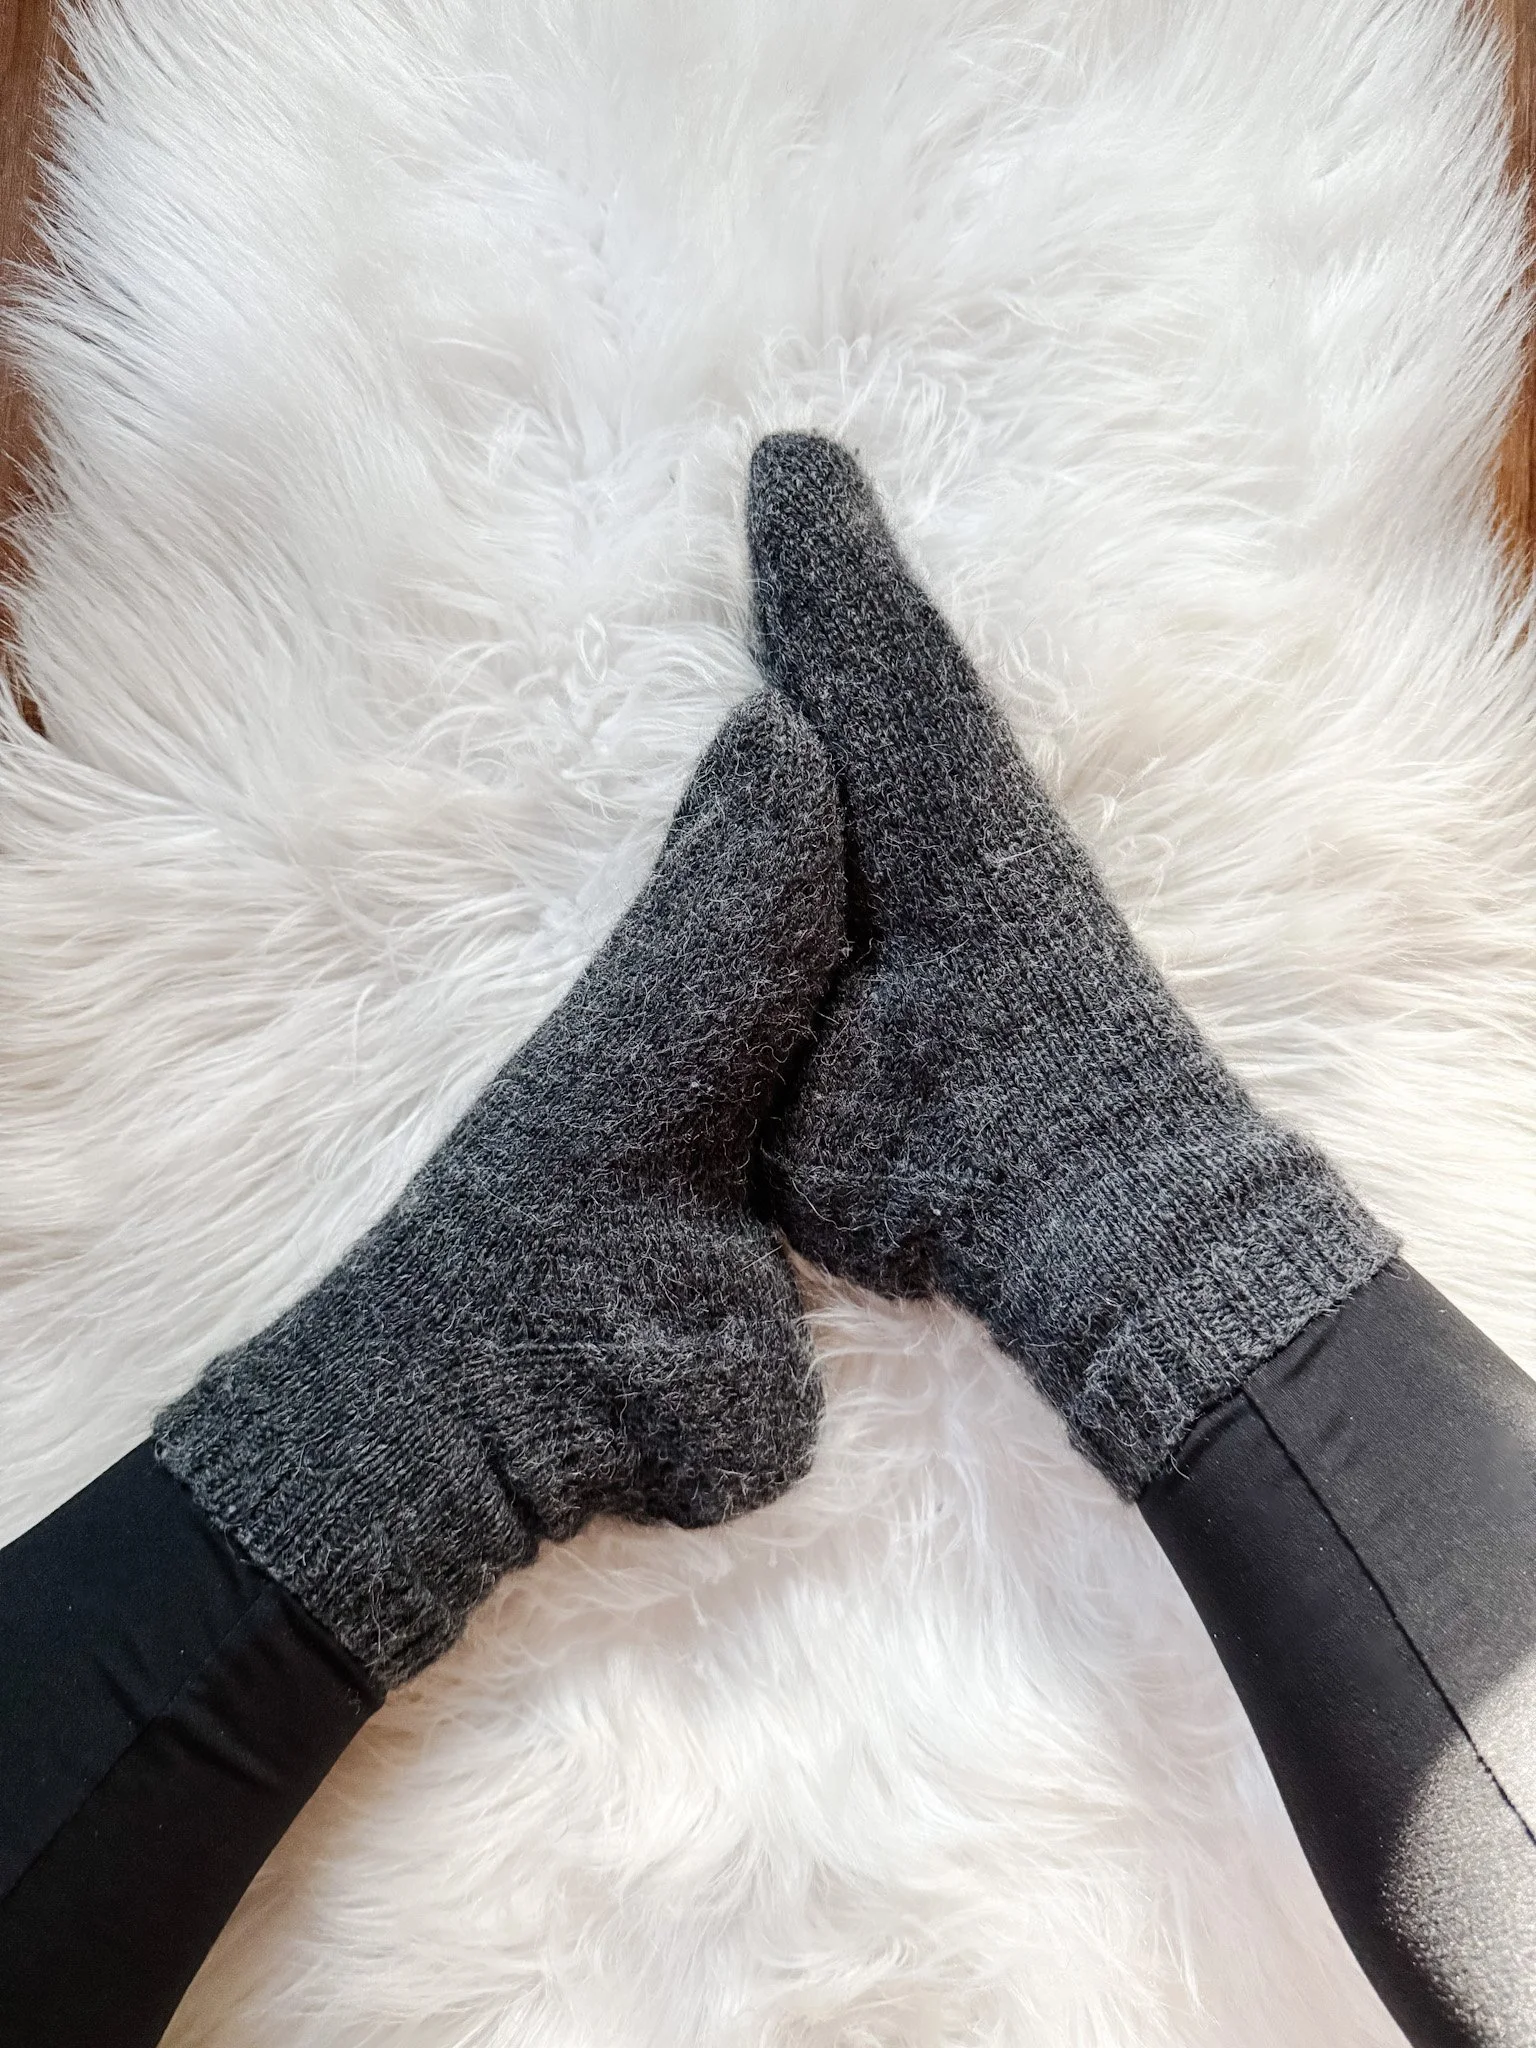
WATCH THE TUTORIAL HERE: https://m1rknit.com/tutorials/heel-flap-and-gusset-sock-tutorial
The SOCKS 01 Knitting Pattern is an intermediate pattern for knitting a classic pair of cuff-down shortie socks featuring 2 x 2 ribbing, a slip-stitch heel flap, traditional heel turn, gusset shaping and a grafted toe.
Worked in fingering-weight yarn, SOCKS 01 has a clean, simple look designed for everyday wear. The short leg and classic stockinette construction make this a versatile sock pattern while still introducing knitters to traditional heel-flap-and-gusset sock construction.
The downloadable PDF includes clear written instructions, sizing and finished measurements, yarn requirements, gauge information, a size chart, pattern abbreviations and technique guidance to help you complete your project.
ABOUT THE PATTERN
SOCKS 01 is worked from the cuff down and in the round using the magic loop method.
The sock begins with a 2 x 2 ribbed cuff followed by a short stockinette leg. A slip-stitch heel flap is worked flat, followed by a traditional heel turn and picked-up gusset stitches. The foot is worked in stockinette stitch before shaping the toe and grafting the remaining stitches using Kitchener stitch.
Pattern Type: Socks
Skill Level: Intermediate
Construction: Cuff-down, heel flap and gusset, worked in the round using magic loop
Yarn Weight: Fingering
Sizes: Adult S (M, L)
SKILL LEVEL
INTERMEDIATE
This pattern is suitable for knitters comfortable with:
Working in the round using magic loop
2 x 2 ribbing
Working stockinette stitch
Working a slip-stitch heel flap
Turning a heel
Picking up stitches
Working gusset decreases
Kitchener stitch
SIZES + FINISHED MEASUREMENTS
Sizes Included:
Adult S (M, L)
Designed to Fit Foot Circumference:
S: approximately 7" / 18 cm
M: approximately 8" / 20.5 cm
L: approximately 9" / 23 cm
Finished Sock Circumference:
S: approximately 6¼" / 16 cm
M: approximately 7⅛" / 18 cm
L: approximately 8" / 20.5 cm
Cuff Ribbing:
0.75" / 2 cm
Stockinette Leg:
2" / 5 cm
Recommended Ease:
Approximately 10–11% negative ease around the foot.
YARN + GAUGE
Suggested Yarn:
Filcolana Arwetta
Yarn Weight:
Fingering weight
Yarn Requirements:
S: 2 skeins
M: 2 skeins
L: 2 skeins
Filcolana Arwetta contains approximately 210 m per 50 g skein
Alternative Yarn:
DROPS Fabel or another fingering-weight sock yarn that achieves the required gauge.
Gauge:
36 stitches × 44 rounds = 4" / 10 cm in stockinette stitch, worked in the round and unblocked.
Suggested Needles:
2.25 mm (US 1) circular needle with a 32" / 81 cm cable for magic loop, or size required to obtain gauge.
Notions:
Yarn needle
Scissors
Full yarn, needle, gauge and notion information is included in the PDF pattern.
CONSTRUCTION + TECHNIQUES
This pattern includes the following techniques:
Long-tail cast-on
Working in the round using magic loop
2 x 2 ribbing
Stockinette stitch
Slip-stitch heel flap
Traditional heel turn
Picking up heel-flap stitches
Gusset shaping and decreases
Toe decreases
Kitchener stitch
NORWEGIAN KNITTING TUTORIALS
M1R KNIT specializes in teaching the Norwegian knitting method, a continental-style knitting technique with the working yarn held in the left hand.
You do not need to use the Norwegian knitting method to make this pattern unless specifically stated.
Where helpful, the pattern includes links to M1R KNIT video tutorials demonstrating knitting techniques using the Norwegian knitting method.
WHAT'S INCLUDED
✔ Complete downloadable PDF knitting pattern
✔ Step-by-step written instructions
✔ Adult S, M and L sizing
✔ Finished measurements
✔ Size chart
✔ Yarn requirements
✔ Needle and notion information
✔ Gauge information
✔ Pattern abbreviations and technique notes
✔ Kitchener stitch instructions
✔ Links to helpful M1R KNIT tutorials where applicable
✔ Original M1R KNIT design
DIGITAL DOWNLOAD
This listing is for a DIGITAL PDF KNITTING PATTERN ONLY.
No physical product or finished knitted item will be shipped.
Your pattern will be available for digital download after purchase.
USAGE + COPYRIGHT
For personal, non-commercial use only.
Items made from this pattern may not be sold.
Pattern may not be shared, copied or redistributed.
© M1R KNIT. All Rights Reserved.
PATTERN SUPPORT
Questions while knitting? I’m happy to help.
Find more knitting patterns, tutorials and technique guides from M1R KNIT:
Website: M1RKNIT.com
YouTube: @m1rknit
Instagram: @m1rknit
Ravelry: M1R KNIT
SHARE YOUR PROJECT
I’d love to see what you make.
Tag @m1rknit when sharing your finished M1R KNIT project.
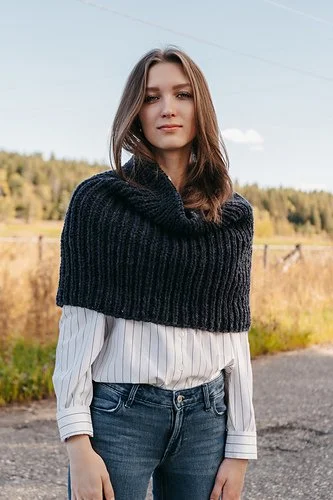
The SHRUG 01 Knitting Pattern is an advanced beginner pattern for knitting a versatile ribbed shrug that can be worn around the shoulders or styled as an oversized cowl.
Worked entirely in 1×1 ribbing, SHRUG 01 creates a soft, highly stretchy fabric with a simple, modern silhouette. The seamless tube construction allows the piece to stretch comfortably around the shoulders while remaining relaxed and cozy when worn around the neck.
The downloadable PDF includes clear written instructions, sizing and finished measurements, yarn requirements, gauge information, and technique guidance to help you complete your project.
ABOUT THE PATTERN
SHRUG 01 is worked seamlessly in the round using 1×1 rib stitch throughout.
The simple tube construction requires no shaping, increases, decreases, seaming, cables, lace, or colourwork. The naturally stretchy ribbed fabric allows the finished piece to be worn two ways — stretched over the shoulders as a shrug or gathered around the neck as an oversized cowl.
Pattern Type: Shrug / Cowl
Skill Level: Advanced Beginner
Construction: Worked seamlessly in the round
Yarn Weight: Bulky
Sizes: One Size
SKILL LEVEL
ADVANCED BEGINNER
This pattern is suitable for knitters comfortable with:
Casting on
Knit stitches
Purl stitches
1×1 rib stitch
Joining and working in the round
Binding off
Weaving in ends
SIZES + FINISHED MEASUREMENTS
Sizes Included:
One Size
Designed to Fit:
Approximately 32–40" / 81–102 cm bust/chest circumference when worn around the shoulders.
Finished Measurements:
Circumference, relaxed: 26" / 66 cm
Width, laid flat: 13" / 33 cm
Length: 18" / 45.5 cm
Fit Note:
SHRUG 01 is designed with a highly stretchy 1×1 ribbed fabric. When worn as a shrug, the ribbing expands to stretch comfortably around the shoulders. When worn as a cowl, the fabric remains more relaxed and gathers naturally around the neck.
YARN + GAUGE
Suggested Yarn:
Lion Brand Hue & Me
Yarn Weight:
Bulky / CYC #5
Yarn Requirements:
One Size: approximately 274 yd / 250 m
2 skeins / 250 g total
Gauge:
14 stitches × 14 rounds = 4" / 10 cm in 1×1 rib stitch
Suggested Needles:
5.5 mm / US 9 circular needles, or size needed to obtain gauge
24" / 60 cm–32" / 80 cm cable
Notions:
Yarn needle
Stitch markers
Beginning-of-round marker
Scissors
Full yarn, needle, gauge, and notion information is included in the PDF pattern.
CONSTRUCTION + TECHNIQUES
This pattern includes the following techniques:
Casting on
Joining to work in the round
Working with circular needles
Knit stitches
Purl stitches
1×1 rib stitch
Binding off
Weaving in ends
NORWEGIAN KNITTING TUTORIALS
M1R KNIT specializes in teaching the Norwegian knitting method, a continental-style knitting technique with the working yarn held in the left hand.
You do not need to use the Norwegian knitting method to make this pattern unless specifically stated.
Visit M1R KNIT on YouTube for knitting tutorials demonstrating techniques using the Norwegian knitting method.
WHAT'S INCLUDED
✔ Complete downloadable PDF knitting pattern
✔ Step-by-step written instructions
✔ Sizing and finished measurements
✔ Yarn requirements
✔ Needle and notion information
✔ Gauge information
✔ Pattern abbreviations and technique notes
✔ Finished measurement schematic
✔ M1R KNIT tutorial resources
✔ Original M1R KNIT design
DIGITAL DOWNLOAD
This listing is for a DIGITAL PDF KNITTING PATTERN ONLY.
No physical product or finished knitted item will be shipped.
Your pattern will be available for digital download after purchase.
USAGE + COPYRIGHT
For personal, non-commercial use only.
Items made from this pattern may not be sold.
Pattern may not be shared, copied, reproduced, or redistributed.
© M1R KNIT. All Rights Reserved.
PATTERN SUPPORT
Questions while knitting? I’m happy to help.
Find more knitting patterns, tutorials, and technique guides from M1R KNIT:
Website: M1RKNIT.com
YouTube: @m1rknit
Instagram: @m1rknit
Ravelry: M1R KNIT
SHARE YOUR PROJECT
I’d love to see what you make.
Tag @m1rknit when sharing your finished M1R KNIT project.
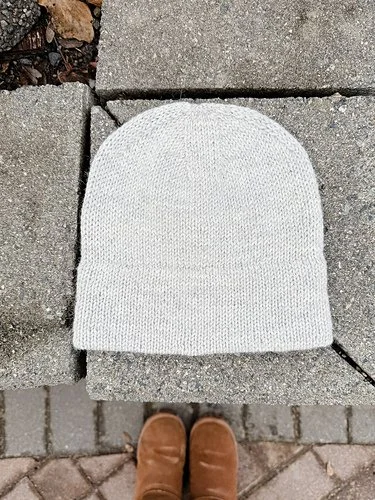
The BEANIE 02 Knitting Pattern is an advanced beginner pattern for knitting a classic double-brim beanie with a clean stockinette finish and shaped crown.
Worked seamlessly in the round from the bottom up, BEANIE 02 features a warm double-folded brim and a simple, close-fitting silhouette. The understated stockinette fabric makes this an easy-to-wear everyday beanie while allowing the construction details to take centre stage.
The downloadable PDF includes clear written instructions, sizing and finished measurements, yarn requirements, gauge information, a schematic, abbreviations, and technique guidance to help you complete your project.
ABOUT THE PATTERN
BEANIE 02 is worked seamlessly from the bottom up in the round using stockinette stitch.
The brim is knit to double length, folded inward, and joined by knitting the live stitches together with the cast-on edge to create a smooth, warm double layer. The body is worked in stockinette before symmetrical decreases shape the crown.
Pattern Type: Beanie
Skill Level: Advanced Beginner
Construction: Bottom-up, seamless, worked in the round
Yarn Weight: DK
Sizes: One Size Adult
SKILL LEVEL
ADVANCED BEGINNER
This pattern is suitable for knitters comfortable with:
Long-tail cast-on
Joining and knitting in the round
Stockinette stitch in the round
Creating and joining a double-folded brim
Working decreases including ssk and k2tog
Working small circumferences using DPNs or Magic Loop
Gathering remaining stitches to close a crown
SIZES + FINISHED MEASUREMENTS
Sizes Included:
One Size Adult
Designed to Fit:
Head circumference: 21–23"/53–58.5 cm
Finished Measurements:
Circumference: 18.5"/47 cm
Height with brim folded: 8.5"/21.5 cm
Folded brim depth: approximately 3"/7.5 cm
Recommended Ease:
Approximately 2.5–4.5"/6–11.5 cm of negative ease for a close, comfortable fit.
YARN + GAUGE
Suggested Yarn:
DROPS Lima in Pearl Grey #9020
Yarn Weight:
DK
Yarn Requirements:
One Size: 2 skeins
50 g/109 yds per skein
Approximately 218 yds/200 m total
Gauge:
20 stitches × 28 rounds = 4"/10 cm in stockinette stitch, blocked
Suggested Needles:
3.25 mm/US 3 circular needle for brim
4 mm/US 6, 16"/40 cm circular needle for body, or size needed to obtain gauge
4 mm/US 6 DPNs or 32–40"/80–100 cm circular needle for Magic Loop during crown shaping
Notions:
Yarn needle
Stitch markers
Beginning-of-round marker
Scissors
Full yarn, needle, gauge, and notion information is included in the PDF pattern.
CONSTRUCTION + TECHNIQUES
This pattern includes the following techniques:
Long-tail cast-on
Knitting in the round
Stockinette stitch
Folding and joining a double-knit brim
ssk left-leaning decreases
k2tog right-leaning decreases
Crown shaping
DPN or Magic Loop small-circumference knitting
Gathering stitches to close the crown
Blocking
NORWEGIAN KNITTING TUTORIALS
M1R KNIT specializes in teaching the Norwegian knitting method, a continental-style knitting technique with the working yarn held in the left hand.
You do not need to use the Norwegian knitting method to make this pattern.
M1R KNIT knitting tutorials can be used alongside the pattern to help you learn and practise many of the techniques used throughout the project.
WHAT'S INCLUDED
✔ Complete downloadable PDF knitting pattern
✔ Step-by-step written instructions
✔ Sizing and finished measurements
✔ Yarn requirements
✔ Needle and notion information
✔ Gauge information
✔ Pattern abbreviations and technique notes
✔ Beanie schematic
✔ Crown-shaping instructions
✔ Original M1R KNIT design
DIGITAL DOWNLOAD
This listing is for a DIGITAL PDF KNITTING PATTERN ONLY.
No physical product or finished knitted item will be shipped.
Your pattern will be available for digital download after purchase.
USAGE + COPYRIGHT
This pattern may not be shared, copied, or redistributed.
Small businesses with an annual income of CAD $30,000 or less may sell finished items made from this pattern with credit given to M1R KNIT.
© M1R KNIT. All Rights Reserved.
PATTERN SUPPORT
Questions while knitting? I’m happy to help.
Find more knitting patterns, tutorials, and technique guides from M1R KNIT:
Website: M1RKNIT.com
YouTube: @m1rknit
Instagram: @m1rknit
Ravelry: M1R KNIT
SHARE YOUR PROJECT
I’d love to see what you make.
Tag @m1rknit when sharing your finished M1R KNIT project.
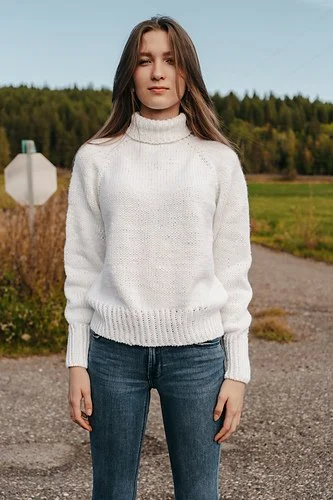
The Turtleneck Pullover 01 Knitting Pattern is an advanced beginner sweater pattern featuring top-down raglan construction, a classic folded turtleneck, and clean stockinette fabric finished with 1 × 1 twisted rib.
Designed with approximately 4–4.5"/10–11.5 cm of positive ease, this pullover has a comfortable, classic fit with long sleeves and a deep ribbed hem. Wide raglan increases create a subtle design detail along the shoulders while maintaining the simple, timeless look of the sweater.
The downloadable PDF includes clear written instructions, sizing and finished measurements, yarn requirements, gauge information, schematics, and technique guidance to help you complete your project.
ABOUT THE PATTERN
Turtleneck Pullover 01 is worked top-down, beginning with the upper body worked flat while the neckline and raglan shaping are established. The work is then joined in the round before the body and sleeves are divided and worked separately.
The body and sleeves are worked primarily in stockinette stitch. The lower hem and sleeve cuffs are finished in 1 × 1 twisted rib, and the turtleneck collar is picked up and worked last.
Pattern Type: Pullover Sweater
Skill Level: Advanced Beginner
Construction: Top-down raglan; initially worked flat, then joined and worked in the round
Yarn Weight: Worsted
Sizes: XS (S, M, L, XL, 2X)
SKILL LEVEL
ADVANCED BEGINNER
This pattern is suitable for knitters comfortable with:
Working both flat and in the round
Raglan increases and basic garment shaping
Working M1R/M1L and purl-side increases
Separating body and sleeve stitches
Picking up stitches
Following detailed written instructions
SIZES + FINISHED MEASUREMENTS
Sizes Included:
XS (S, M, L, XL, 2X)
Designed to Fit Bust Circumference:
30 (34.5, 38, 41, 45.5, 48)"/76 (87.5, 96.5, 104, 115.5, 122) cm
Finished Bust Circumference:
34 (38.5, 42.5, 45, 49.5, 52)"/86 (98, 108, 114, 126, 132) cm
Finished Length:
20.5 (21, 22, 22.5, 23, 24)"/52 (53, 56, 57, 58, 61) cm
Armhole Depth:
8.25 (8.5, 9, 9.5, 10, 10.5)"/21 (22, 23, 24, 25, 27) cm
Sleeve Length:
19"/48 cm
Recommended Ease:
Approximately 4–4.5"/10–11.5 cm of positive ease.
YARN + GAUGE
Suggested Yarn:
Lion Brand Pound of Love®
Yarn Weight:
Worsted
Yarn Requirements:
XS: 900 m
S: 1033 m
M: 1144 m
L: 1230 m
XL: 1347 m
2X: 1493 m
The pattern recommends 2 skeins for all sizes when using Lion Brand Pound of Love® at approximately 932 m/454 g per skein.
Gauge:
19 stitches × 24 rounds = 4"/10 cm in stockinette stitch, washed and blocked.
Suggested Needles:
5 mm/US 8 or size needed to obtain gauge
3.5 mm/US 4 for ribbing
Circular needles appropriate for working the body, neckband, and small-circumference sleeves are required.
Notions:
Yarn needle
Stitch markers
Stitch holders or waste yarn
Full yarn, needle, gauge, and notion information is included in the PDF pattern.
CONSTRUCTION + TECHNIQUES
This pattern includes the following techniques:
Top-down raglan construction
Working flat and in the round
Stockinette stitch
Wide M1R and M1L raglan increases
M1RP and M1LP purl-side increases
Neckline shaping
Separating body and sleeves
Picking up stitches
K2tog and SSK decreases
1 × 1 twisted rib
Stretchy bind off
NORWEGIAN KNITTING TUTORIALS
M1R KNIT specializes in teaching the Norwegian knitting method, a continental-style knitting technique with the working yarn held in the left hand.
You do not need to use the Norwegian knitting method to make this pattern unless specifically stated.
Where helpful, the pattern includes links to M1R KNIT video tutorials demonstrating knitting techniques using the Norwegian knitting method.
WHAT'S INCLUDED
✔ Complete downloadable PDF knitting pattern
✔ Step-by-step written instructions
✔ Sizes XS–2X
✔ Sizing and finished measurements
✔ Yarn requirements
✔ Needle and notion information
✔ Gauge information
✔ Pattern abbreviations and technique notes
✔ Finished garment schematic
✔ Row-by-row raglan shaping instructions for each size
✔ Links to helpful M1R KNIT tutorials where applicable
✔ Original M1R KNIT design
DIGITAL DOWNLOAD
This listing is for a DIGITAL PDF KNITTING PATTERN ONLY.
No physical product or finished knitted item will be shipped.
Your pattern will be available for digital download after purchase.
USAGE + COPYRIGHT
For personal, non-commercial use only.
Items made from this pattern may not be sold.
Pattern may not be shared, copied, or redistributed.
© M1R KNIT. All Rights Reserved.
PATTERN SUPPORT
Questions while knitting? I’m happy to help.
Find more knitting patterns, tutorials, and technique guides from M1R KNIT:
Website: M1RKNIT.com
YouTube: @m1rknit
Instagram: @m1rknit
Ravelry: M1R KNIT
SHARE YOUR PROJECT
I’d love to see what you make.
Tag @m1rknit when sharing your finished M1R KNIT project.
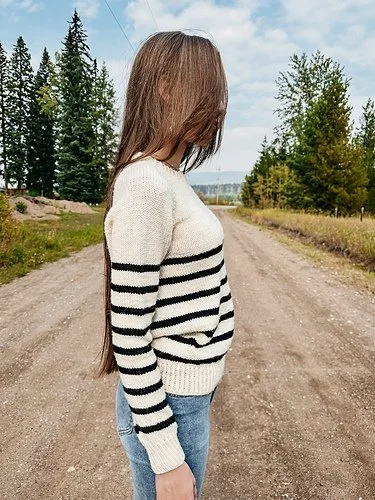
The Raglan Pullover 01 Knitting Pattern is an advanced beginner pattern for knitting a classic top-down raglan sweater featuring a shaped neckline, relaxed fit, simple stockinette fabric, and contrasting stripes.
Worked seamlessly from the top down, the pullover has approximately 3.5–4 in / 9–10 cm of positive ease for an easy, comfortable fit. The body and sleeves are finished with 1 × 1 ribbing, with the option of a regular or folded ribbed neckband.
The downloadable PDF includes clear written instructions, sizing and finished measurements, yarn requirements, gauge information, and technique guidance to help you complete your project.
Watch the pattern tutorial here: https://youtu.be/ZDgLrPKm8xw
ABOUT THE PATTERN
Raglan Pullover 01 is worked top down, beginning with the neckline and upper yoke worked flat while the front neck and raglan shaping are created simultaneously.
Once the front neckline is complete, the sweater is joined and worked in the round. Sleeve stitches are placed on hold while the body is completed, then each sleeve is worked from the underarm to the cuff. Neckband stitches are picked up and worked last.
Pattern Type: Pullover / Sweater
Skill Level: Advanced Beginner
Construction: Top-down raglan; worked flat and in the round; seamless
Yarn Weight: DK
Sizes: XS (S, M, L, XL, 2X, 3X, 4X)
SKILL LEVEL
ADVANCED BEGINNER
This pattern is suitable for knitters comfortable with:
Knitting and purling
Working flat and in the round
Increasing and decreasing
Following size-specific instructions and stitch counts
Picking up and knitting stitches
SIZES + FINISHED MEASUREMENTS
Sizes Included:
XS (S, M, L, XL, 2X, 3X, 4X)
Designed to Fit Bust Circumference:
30 (34.5, 38, 41, 45.5, 48, 53, 57.5) in
76 (87.5, 96.5, 104, 115.5, 122, 135, 146) cm
Finished Bust Circumference:
34 (38.5, 42, 44.5, 49.5, 52, 56.5, 61.5) in
86 (98, 106.5, 113, 126, 132, 143.5, 156) cm
Recommended Ease:
Approximately 3.5–4 in / 9–10 cm of positive ease.
YARN + GAUGE
Suggested Yarn:
DK-weight superwash merino in two contrasting colours.
The sample is shown in:
MC: Camargue Ivory
CC: Dark Horse
Yarn Weight:
DK
Total Yarn Requirements:
XS: 1,216 yd / 1,112 m — 500 g
S: 1,416 yd / 1,295 m — 600 g
M: 1,559 yd / 1,426 m — 700 g
L: 1,631 yd / 1,491 m — 700 g
XL: 1,879 yd / 1,718 m — 800 g
2X: 1,977 yd / 1,808 m — 900 g
3X: 2,201 yd / 2,013 m — 900 g
4X: 2,390 yd / 2,185 m — 1,000 g
The pattern also provides the MC and CC weight requirements for each size.
Gauge:
19 stitches × 30 rounds = 4 in × 4 in / 10 × 10 cm in stockinette stitch worked in the round, measured after washing and drying.
Suggested Needles:
US 7 / 4.5 mm — main body and sleeves
US 6 / 4 mm — neckband
US 4 / 3.5 mm — ribbing
or size needed to obtain gauge
Notions:
Stitch markers
Stitch holders or waste yarn
Locking stitch marker or safety pin
Yarn needle
Scissors
Full yarn, needle, gauge, and notion information is included in the PDF pattern.
CONSTRUCTION + TECHNIQUES
This pattern includes the following techniques:
Top-down raglan construction
Stockinette stitch worked flat and in the round
Kfb and pfb raglan increases
Cable cast-on for neckline shaping
Knitted cast-on at the underarms
Placing sleeve stitches on hold
Working contrasting stripes in the round
SSK and k2tog sleeve decreases
1 × 1 ribbing
Picking up and knitting neckline stitches
Flexible bind off
Optional folded ribbed neckband
NORWEGIAN KNITTING TUTORIALS
M1R KNIT specializes in teaching the Norwegian knitting method, a continental-style knitting technique with the working yarn held in the left hand.
You do not need to use the Norwegian knitting method to make this pattern unless specifically stated.
Where helpful, the pattern includes links to M1R KNIT video tutorials demonstrating knitting techniques using the Norwegian knitting method.
WHAT'S INCLUDED
✔ Complete downloadable PDF knitting pattern
✔ Step-by-step written instructions
✔ Sizes XS–4X
✔ Sizing and finished measurements
✔ Yarn requirements
✔ Needle and notion information
✔ Gauge information
✔ Pattern abbreviations and technique notes
✔ Links to helpful M1R KNIT tutorials where applicable
✔ Original M1R KNIT design
DIGITAL DOWNLOAD
This listing is for a DIGITAL PDF KNITTING PATTERN ONLY.
No physical product or finished knitted item will be shipped.
Your pattern will be available for digital download after purchase.
USAGE + COPYRIGHT
This pattern may not be shared, copied, reproduced, or redistributed.
Small businesses with an annual income of $30,000 CAD or less may sell finished items made from this pattern with credit given to M1R KNIT.
© M1R KNIT. All Rights Reserved.
PATTERN SUPPORT
Questions while knitting? I’m happy to help.
Find more knitting patterns, tutorials, and technique guides from M1R KNIT:
Website: M1RKNIT.com
YouTube: @m1rknit
Instagram: @m1rknit
Ravelry: M1R KNIT
SHARE YOUR PROJECT
I’d love to see what you make.
Tag @m1rknit when sharing your finished M1R KNIT project.
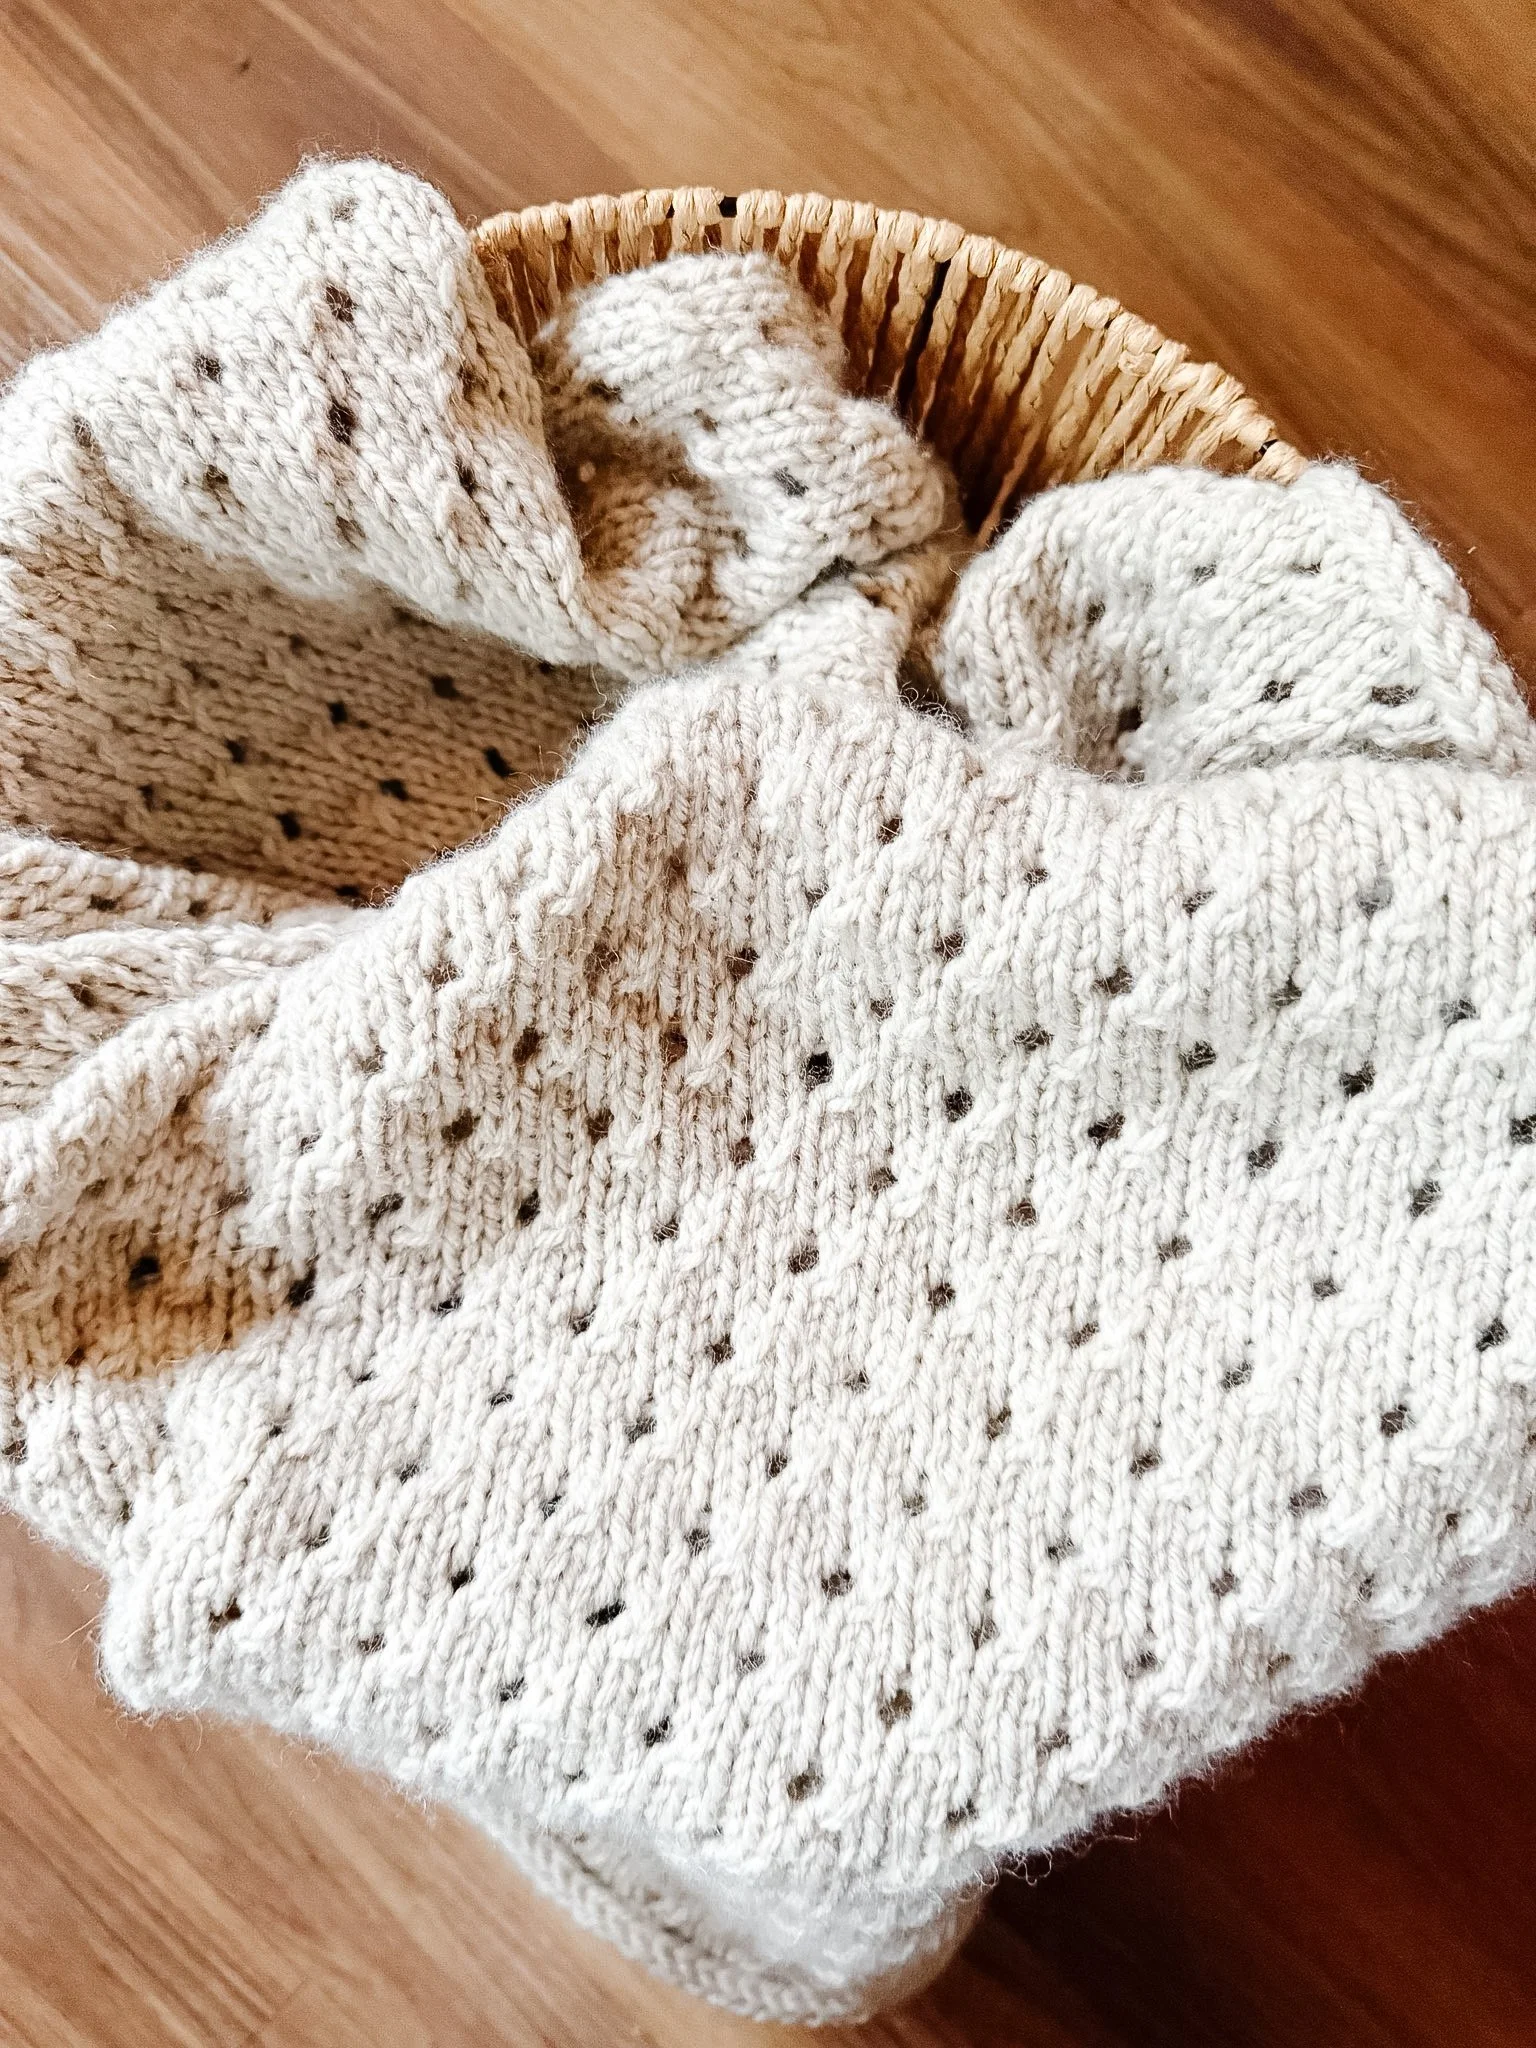
The Blanket 02 Knitting Pattern is an advanced beginner pattern for knitting a classic textured blanket featuring a simple staggered eyelet stitch and a clean applied I-cord edging.
Worked flat in an easy-to-follow 8-row repeat, the staggered eyelets create a light, understated texture across the surface of the blanket. The finished blanket is bordered with an applied I-cord for a polished, modern edge.
The downloadable PDF includes clear written instructions, sizing and finished measurements, yarn requirements, gauge information, and technique guidance to help you complete your project.
A full tutorial for this blanket project is also available on the M1R KNIT blog and YouTube channel here: https://m1rknit.com/tutorials/blanket-02
ABOUT THE PATTERN
Blanket 02 is worked flat using an 8-row staggered eyelet stitch pattern. After the main blanket is completed and bound off, an applied I-cord is worked around the entire perimeter to create a smooth, finished edge.
The eyelet pattern uses simple yarn overs and decreases to create evenly spaced openings that shift position through the repeat, producing the subtle staggered design.
Pattern Type: Blanket
Skill Level: Advanced Beginner
Construction: Worked flat with applied I-cord edging
Yarn Weight: Worsted
Sizes: Baby Small through King
SKILL LEVEL
ADVANCED BEGINNER
This pattern is suitable for knitters comfortable with:
Knitting
Purling
Long-tail cast-on
Yarn overs
K2TOG decreases
Working a repeating stitch pattern
Picking up and knitting stitches
Applied I-cord edging
Grafting live I-cord stitches
SIZES + FINISHED MEASUREMENTS
Sizes Included:
Baby Small
Baby Large
Throw
Twin
Queen
King
Finished Measurements:
Baby Small: 30 × 36" (76 × 91.5 cm)
Baby Large: 40 × 60" (101.5 × 152.5 cm)
Throw: 50 × 60" (127 × 152.5 cm)
Twin: 65 × 90" (165 × 228.5 cm)
Queen: 90 × 90" (228.5 × 228.5 cm)
King: 108 × 92" (274.5 × 233.5 cm)
YARN + GAUGE
Suggested Yarn:
Lion Brand Wool-Ease
Yarn Weight:
Worsted Weight
Yarn Requirements:
Each skein contains approximately 180 metres / 197 yards.
Baby Small: 5 skeins — approx. 900 m / 984 yd
Baby Large: 10 skeins — approx. 1,800 m / 1,969 yd
Throw: 13 skeins — approx. 2,340 m / 2,559 yd
Twin: 24 skeins — approx. 4,320 m / 4,724 yd
Queen: 33 skeins — approx. 5,940 m / 6,496 yd
King: 41 skeins — approx. 7,380 m / 8,071 yd
Gauge:
16 stitches × 24 rows = 4" (10 cm) in pattern, blocked.
Suggested Needles:
4.5 mm (US 7) circular needles, or size needed to obtain gauge
Recommended Circular Needle Lengths, Tip to Tip:
Baby Small: 32" / 80 cm
Baby Large: 40" / 100 cm
Throw: 40" / 100 cm
Twin: 47" / 120 cm
Queen: 60" / 150 cm minimum
King: 60" / 150 cm minimum; longer preferred
Notions:
Tape measure
Scissors
Tapestry needle
Full yarn, needle, gauge, and notion information is included in the PDF pattern.
CONSTRUCTION + TECHNIQUES
This pattern includes the following techniques:
Long-tail cast-on
Knitting and purling
Staggered eyelet stitch pattern
Yarn overs
K2TOG decreases
Working an 8-row stitch repeat
Picking up and knitting stitches
Applied I-cord edging
Working I-cord around corners
Grafting I-cord ends
Blocking to finished measurements
NORWEGIAN KNITTING TUTORIALS
M1R KNIT specializes in teaching the Norwegian knitting method, a continental-style knitting technique with the working yarn held in the left hand.
You do not need to use the Norwegian knitting method to make this pattern unless specifically stated.
Where helpful, the pattern includes links to M1R KNIT video tutorials demonstrating knitting techniques using the Norwegian knitting method. Learn the Norwegian knitting method here: https://m1rknit.com/tutorials/start-here-learn-the-norwegian-knitting-method
A full Blanket 02 project tutorial is also available on the M1R KNIT blog and YouTube channel: https://m1rknit.com/tutorials/blanket-02
WHAT'S INCLUDED
✔ Complete downloadable PDF knitting pattern
✔ Step-by-step written instructions
✔ Six blanket sizes from Baby Small through King
✔ Finished measurements
✔ Yarn requirements for every size
✔ Needle and notion information
✔ Gauge information
✔ Pattern abbreviations and technique notes
✔ Staggered eyelet stitch instructions
✔ Applied I-cord edging instructions
✔ I-cord grafting instructions
✔ Links to helpful M1R KNIT tutorials where applicable
✔ Full project tutorial available on the M1R KNIT blog and YouTube channel
✔ Original M1R KNIT design
DIGITAL DOWNLOAD
This listing is for a DIGITAL PDF KNITTING PATTERN ONLY.
No physical product or finished knitted item will be shipped.
Your pattern will be available for digital download after purchase.
USAGE + COPYRIGHT
This pattern may not be shared, copied, reproduced or redistributed.
Small businesses with an annual income of $30,000 CAD or less may sell finished items made from this pattern with credit given to M1R KNIT.
The pattern itself may not be reproduced, resold or distributed.
©2026 M1R KNIT. All Rights Reserved.
PATTERN SUPPORT
Questions while knitting? I’m happy to help.
Find more knitting patterns, tutorials and technique guides from M1R KNIT:
Website:M1RKNIT.com
YouTube: @m1rknit
Instagram: @m1rknit
Ravelry: M1R KNIT
SHARE YOUR PROJECT
I’d love to see what you make.
Tag @m1rknit when sharing your finished M1R KNIT project.
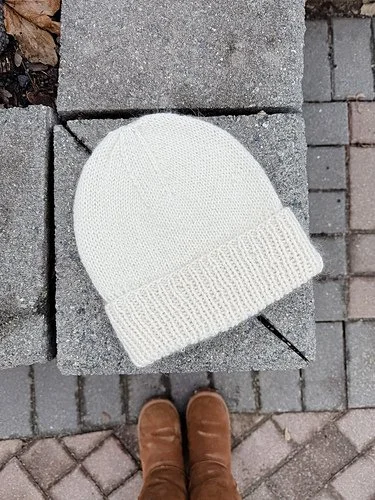
The Beanie 05 Knitting Pattern is an advanced beginner pattern for knitting a classic fitted beanie featuring a deep folded ribbed brim, smooth stockinette body, and gradually shaped crown.
Worked with one strand of worsted-weight wool held together with one strand of silk mohair, Beanie 05 has a soft, warm fabric with a subtle mohair halo. The timeless silhouette is designed to fit most adult head sizes with comfortable negative ease.
The downloadable PDF includes clear written instructions, sizing and finished measurements, yarn requirements, gauge information, schematics, and technique guidance to help you complete your project.
ABOUT THE PATTERN
Beanie 05 is worked bottom-up, seamlessly in the round. The beanie begins with 1 × 1 ribbing to create a generous folded brim before transitioning to stockinette stitch for the body.
The crown is divided into three sections and shaped with paired decreases for a clean, gradually rounded finish. The pattern is worked holding one strand of worsted-weight wool together with one strand of lace-weight silk mohair throughout.
Pattern Type: Beanie
Skill Level: Advanced Beginner
Construction: Bottom-up, worked seamlessly in the round
Yarn Weight: Worsted + Lace Weight Mohair held together
Sizes: One Size
SKILL LEVEL
ADVANCED BEGINNER
This pattern is suitable for knitters comfortable with:
Casting on
Working knit and purl stitches
Working in the round
Working 1 × 1 ribbing
Working with two strands of yarn held together
Basic increases and decreases
Using Magic Loop or double-pointed needles for small circumferences
SIZES + FINISHED MEASUREMENTS
Sizes Included:
One Size
Designed to Fit:
Head circumference: 21–23"/53–58.5 cm
Finished Measurements:
Circumference: 18.5"/47 cm
Height with brim folded: 9.5"/24 cm
Height with brim unfolded: 12.5"/32 cm
Brim depth unfolded: 6"/15 cm
Brim depth folded: 3"/7.5 cm
YARN + GAUGE
Suggested Yarn:
Knomad Marshmallow Superwash Worsted
100 g/219 yds per skein
held together with
Knomad Cirrus Lace Weight Silk Mohair
50 g/437 yds per skein
Yarn Weight:
One strand worsted weight + one strand lace-weight silk mohair held together
Yarn Requirements:
One Size: 1 skein worsted-weight yarn + 1 skein lace-weight silk mohair
Gauge:
19 stitches × 26 rounds = 4"/10 cm in stockinette stitch, worked in the round and blocked.
Suggested Needles:
3.25 mm/US 3, 16" circular needle for brim
3.5 mm/US 4, 16" circular needle for body
3.5 mm/US 4 long circular needle for Magic Loop or DPNs for crown shaping
Or needle size needed to obtain gauge
Notions:
Tapestry needle
Stitch markers
Beginning-of-round marker
Scissors
Full yarn, needle, gauge, and notion information is included in the PDF pattern.
CONSTRUCTION + TECHNIQUES
This pattern includes the following techniques:
Long-tail cast-on
Working in the round
1 × 1 ribbing
Stockinette stitch in the round
Holding two strands of yarn together
Kfb increase
Ssk and k2tog decreases
Crown shaping
Magic Loop or DPNs for working a small circumference
Finishing and blocking
NORWEGIAN KNITTING TUTORIALS
M1R KNIT specializes in teaching the Norwegian knitting method, a continental-style knitting technique with the working yarn held in the left hand.
You do not need to use the Norwegian knitting method to make this pattern unless specifically stated.
Where helpful, the pattern includes links to M1R KNIT video tutorials demonstrating knitting techniques using the Norwegian knitting method.
WHAT'S INCLUDED
✔ Complete downloadable PDF knitting pattern
✔ Step-by-step written instructions
✔ Sizing and finished measurements
✔ Yarn requirements
✔ Needle and notion information
✔ Gauge information
✔ Pattern abbreviations and technique notes
✔ Beanie schematic
✔ Links to helpful M1R KNIT tutorials where applicable
✔ Original M1R KNIT design
DIGITAL DOWNLOAD
This listing is for a DIGITAL PDF KNITTING PATTERN ONLY.
No physical product or finished knitted item will be shipped.
Your pattern will be available for digital download after purchase.
USAGE + COPYRIGHT
For personal use only.
The pattern itself may not be shared, copied, reproduced, or redistributed.
Please refer to the PDF pattern for M1R KNIT's current terms regarding the sale of finished items made from this design.
© M1R KNIT. All Rights Reserved.
PATTERN SUPPORT
Questions while knitting? I’m happy to help.
Find more knitting patterns, tutorials, and technique guides from M1R KNIT:
Website: M1RKNIT.com
YouTube: @m1rknit
Instagram: @m1rknit
Ravelry: M1R KNIT
SHARE YOUR PROJECT
I’d love to see what you make.
Tag @m1rknit when sharing your finished M1R KNIT project.
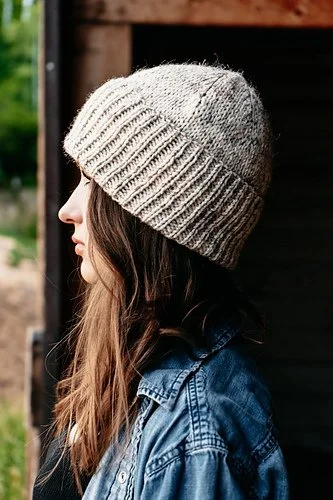
The BEANIE 01 Knitting Pattern is a confident beginner pattern for knitting a classic, fitted adult beanie featuring a deep folded brim worked in half-twisted rib and simple stockinette construction.
Worked seamlessly from the bottom up, BEANIE 01 combines clean, classic styling with traditional crown shaping for an everyday hat you’ll reach for again and again.
The downloadable PDF includes clear written instructions, finished measurements, yarn requirements, gauge information, abbreviations and technique guidance to help you complete your project.
ABOUT THE PATTERN
BEANIE 01 is worked seamlessly from the bottom up in the round.
The beanie begins with a 4" / 10 cm half-twisted rib brim designed to be worn folded. The body is worked in stockinette stitch before the crown is shaped with evenly spaced K2tog decreases. Double-pointed needles are used as the crown circumference becomes too small for the circular needle.
Pattern Type: Beanie
Skill Level: Confident Beginner
Construction: Bottom-up, seamless, worked in the round
Yarn Weight: Worsted
Sizes: One Size
SKILL LEVEL
CONFIDENT BEGINNER
This pattern is suitable for knitters comfortable with:
Long-tail cast on
Half-twisted rib
Working in the round
Stockinette stitch
K2tog decreases
Switching needle sizes
Crown shaping
Working with double-pointed needles
SIZES + FINISHED MEASUREMENTS
Sizes Included:
One Size
Designed to Fit:
Head circumference: 20.5–23" / 52–58.5 cm
Finished Measurements:
Hat circumference: 18.5" / 47 cm
Hat height: 10.75" / 27.3 cm
Brim depth: 4" / 10 cm unfolded
Recommended Ease:
Approximately 2–4.5" / 5–11.5 cm of negative ease, depending on head circumference.
YARN + GAUGE
Suggested Yarn:
Lion Brand Wool-Ease Worsted
Yarn Weight:
Worsted
Yarn Requirements:
85 g / 180 m
1 skein in Wheat [620-402]
Gauge:
18 stitches × 24 rounds = 4" × 4" / 10 × 10 cm in stockinette stitch, blocked.
Suggested Needles:
4 mm (US 6) 16" / 40 cm circular needle for ribbing
5 mm (US 8) 16" / 40 cm circular needle, or size needed to obtain gauge, for the main body
5 mm (US 8) DPNs, or DPNs in the size needed to obtain gauge, for crown shaping
Notions:
Yarn needle
7 stitch markers — 1 BOR marker + 6 section markers
Scissors
Full yarn, needle, gauge and notion information is included in the PDF pattern.
CONSTRUCTION + TECHNIQUES
This pattern includes the following techniques:
Long-tail cast on
Half-twisted rib
Working in the round
Stockinette stitch
Switching needle sizes
K2tog decreases
Crown shaping
Double-pointed needles
M1R KNIT specializes in teaching the Norwegian knitting method, a continental-style knitting technique with the working yarn held in the left hand.
You do not need to use the Norwegian knitting method to make BEANIE 01.
Where helpful, M1R KNIT tutorials demonstrate knitting techniques using the Norwegian knitting method so you can build your skills while working through your projects.
WHAT'S INCLUDED
✔ Complete downloadable PDF knitting pattern
✔ Step-by-step written instructions
✔ Finished measurements and fit information
✔ Yarn requirements
✔ Needle and notion information
✔ Gauge information
✔ Pattern abbreviations and technique notes
✔ Finished-measurement schematic
✔ Links to helpful M1R KNIT tutorials where applicable
✔ Original M1R KNIT design
DIGITAL DOWNLOAD
This listing is for a DIGITAL PDF KNITTING PATTERN ONLY.
No physical product or finished knitted item will be shipped.
Your pattern will be available for digital download after purchase.
USAGE + COPYRIGHT
This pattern and its instructions may not be copied, shared, reproduced or redistributed.
Small businesses with an annual income of $30,000 CAD or less may sell finished items made from this pattern. Please credit M1R KNIT as the pattern designer.
© 2026 M1R KNIT. All Rights Reserved.
PATTERN SUPPORT
Questions while knitting? I’m happy to help.
Find more knitting patterns, tutorials and technique guides from M1R KNIT:
Website: M1RKNIT.com
YouTube: @m1rknit
Instagram: @m1rknit
Ravelry: M1R KNIT
SHARE YOUR PROJECT
I’d love to see what you make.
Tag @m1rknit when sharing your finished BEANIE 01.
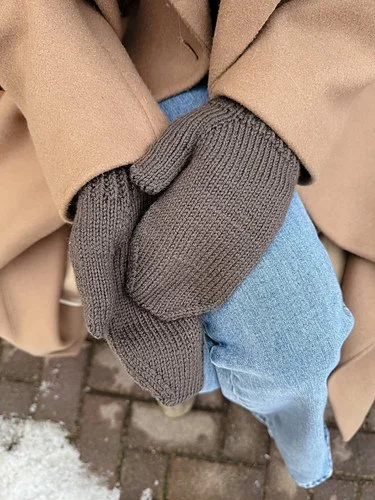
The MITTENS 01 Knitting Pattern is an intermediate pattern for knitting a pair of classic mittens worked seamlessly in the round using the magic-loop method.
Designed with a clean stockinette hand, twisted rib cuff, shaped thumb gusset, and tapered mitten top, MITTENS 01 is a timeless everyday mitten with a simple, polished finish.
The downloadable PDF includes clear written instructions, sizing and finished measurements, yarn requirements, gauge information, schematics, abbreviations, and technique guidance to help you complete your project.
Tutorial support: https://youtu.be/1Zr5gISF05M?si=fgACDpB6K5OB2q53
ABOUT THE PATTERN
MITTENS 01 is worked seamlessly from the cuff up in the round using the magic-loop method.
The mitten begins with a twisted rib cuff before transitioning to stockinette stitch. A shaped thumb gusset is created with increases, the thumb stitches are placed on hold while the hand is completed, and the mitten top is shaped with paired decreases before being grafted closed using Kitchener stitch. The held thumb stitches are then returned to the needles and worked in the round.
Pattern Type: Mittens
Skill Level: Intermediate
Construction: Cuff-up, seamless, worked in the round using magic loop
Yarn Weight: DK
Sizes: Women’s S (M, L, XL)
SKILL LEVEL
INTERMEDIATE
This pattern is suitable for knitters comfortable with:
Working small circumferences in the round using magic loop
Long-tail cast-on
Twisted ribbing
Working increases and decreases
Thumb gusset construction
Kitchener stitch
SIZES + FINISHED MEASUREMENTS
Sizes Included:
Women’s S (M, L, XL)
Designed to Fit Hand Circumference:
S: 6.75" / 17 cm
M: 7.25" / 18.5 cm
L: 8" / 20.5 cm
XL: 8.75" / 22 cm
Finished Total Length:
S: 9" / 22.8 cm
M: 9.5" / 24 cm
L: 10.5" / 26.6 cm
XL: 10.75" / 27.3 cm
Cuff Length:
All sizes: 3" / 7.62 cm
Thumb Length:
S: 1.25" / 3.1 cm
M: 1.5" / 3.8 cm
L: 1.75" / 4.4 cm
XL: 2" / 5 cm
YARN + GAUGE
Suggested Yarn:
Sandnes Garn Double Sunday
Yarn Weight:
DK
50 g / 108 m (approx. 118 yd) per skein
Sample Colour:
3880 Dark Chocolate
Yarn Requirements:
S: 170–190 yd / 155–174 m
M: 170–190 yd / 155–174 m
L: 190–210 yd / 174–192 m
XL: 210–230 yd / 192–210 m
Gauge:
24 stitches × 36 rounds = 4" / 10 cm in stockinette stitch, worked in the round and unblocked.
Suggested Needles:
3.25 mm / US 3 circular needle with a 32" / 81 cm cable, or size needed to obtain gauge
2.75 mm / US 2 circular needle with a 32" / 81 cm cable for ribbing
Notions:
Yarn needle
Stitch markers
Beginning-of-round marker
Scissors
Waste yarn for holding thumb stitches
Full yarn, needle, gauge, and notion information is included in the PDF pattern.
CONSTRUCTION + TECHNIQUES
This pattern includes the following techniques:
Long-tail cast-on
Magic-loop knitting
Twisted 1 × 1 ribbing
Stockinette stitch worked in the round
M1R and M1L increases
Thumb gusset construction
SSK and K2TOG decreases
Holding and returning live thumb stitches
Picking up stitches
Kitchener stitch
NORWEGIAN KNITTING TUTORIALS
M1R KNIT specializes in teaching the Norwegian knitting method, a continental-style knitting technique with the working yarn held in the left hand.
You do not need to use the Norwegian knitting method to make this pattern unless specifically stated.
Where helpful, the pattern includes links to M1R KNIT video tutorials demonstrating knitting techniques using the Norwegian knitting method.
WHAT'S INCLUDED
✔ Complete downloadable PDF knitting pattern
✔ Step-by-step written instructions
✔ Women’s sizes S–XL
✔ Sizing and finished measurements
✔ Yarn requirements
✔ Needle and notion information
✔ Gauge information
✔ Pattern abbreviations and technique notes
✔ Mitten schematic and measurement chart
✔ Links to helpful M1R KNIT tutorials where applicable
✔ Original M1R KNIT design
DIGITAL DOWNLOAD
This listing is for a DIGITAL PDF KNITTING PATTERN ONLY.
No physical product or finished knitted item will be shipped.
Your pattern will be available for digital download after purchase.
USAGE + COPYRIGHT
For personal, non-commercial use only.
Items made from this pattern may not be sold.
Pattern may not be shared, copied, or redistributed.
© M1R KNIT. All Rights Reserved.
PATTERN SUPPORT
Questions while knitting? I’m happy to help.
Find more knitting patterns, tutorials, and technique guides from M1R KNIT:
Website: M1RKNIT.com
YouTube: @m1rknit
Instagram: @m1rknit
Ravelry: M1R KNIT
SHARE YOUR PROJECT
I’d love to see what you make.
Tag @m1rknit when sharing your finished M1R KNIT project.
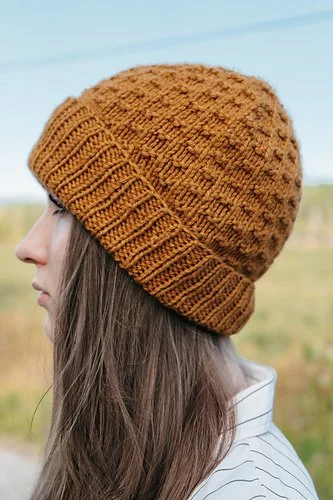
The Beanie 04 Knitting Pattern is an advanced beginner pattern for knitting a classic textured beanie with a folded ribbed brim and an all-over knit-and-purl stitch pattern.
Worked seamlessly in the round from the bottom up, Beanie 04 combines a simple twisted rib brim with subtle staggered texture through the body and shaped crown. The result is a warm, comfortable everyday beanie with a clean, modern finish.
The downloadable PDF includes clear written instructions, finished measurements, yarn requirements, gauge information, abbreviations, pattern notes, and technique guidance to help you complete your project.
ABOUT THE PATTERN
Beanie 04 is worked seamlessly in the round from the bottom up.
The beanie begins with a deep 1 × 1 twisted rib brim before transitioning into a four-round textured stitch pattern created with knit and purl stitches. The crown is shaped with evenly spaced decreases while continuing the texture through the shaping.
Pattern Type: Beanie
Skill Level: Advanced Beginner
Construction: Bottom-up, worked seamlessly in the round
Yarn Weight: Worsted
Sizes: One Size
SKILL LEVEL
ADVANCED BEGINNER
This pattern is suitable for knitters comfortable with:
Casting on
Joining and knitting in the round
Knit and purl stitches
Knitting through the back loop
Following a repeating stitch pattern
Working decreases with k2tog
Working small circumferences for crown shaping
SIZES + FINISHED MEASUREMENTS
Sizes Included:
One Size
Designed to Fit:
Adult head circumference: 20–23"/51–58 cm
Finished Measurements:
Finished circumference, unstretched: approximately 17.75"/45 cm
Finished height, with brim folded: approximately 8.5"/21.6 cm
YARN + GAUGE
Suggested Yarn:
Lion Brand Wool-Ease Worsted Weight in Arrowwood
Yarn Weight:
Worsted
Yarn Requirements:
One Size: 1 skein — 85 g/180 m
Gauge:
19 stitches × 26 rounds = 4"/10 cm in stitch pattern, blocked.
Suggested Needles:
3.5 mm/US 4 circular needle for ribbing
4.5 mm/US 7 circular needle, or size needed to obtain gauge, for main fabric
16"/40 cm circular needle for the majority of the beanie; use your preferred small-circumference method for the crown
Notions:
Yarn needle
Stitch markers
Beginning-of-round marker
Scissors
Full yarn, needle, gauge, and notion information is included in the PDF pattern.
CONSTRUCTION + TECHNIQUES
This pattern includes the following techniques:
Knitting in the round
1 × 1 twisted rib
Knit and purl texture
Knitting through the back loop
Repeating a four-round stitch pattern
K2tog decreases
Crown shaping
Finishing and blocking
NORWEGIAN KNITTING TUTORIALS
M1R KNIT specializes in teaching the Norwegian knitting method, a continental-style knitting technique with the working yarn held in the left hand.
You do not need to use the Norwegian knitting method to make this pattern unless specifically stated.
Where helpful, the pattern includes links to M1R KNIT video tutorials demonstrating knitting techniques using the Norwegian knitting method.
WHAT'S INCLUDED
✔ Complete downloadable PDF knitting pattern
✔ Step-by-step written instructions
✔ Sizing and finished measurements
✔ Yarn requirements
✔ Needle and notion information
✔ Gauge information
✔ Pattern abbreviations and technique notes
✔ Swatching instructions
✔ Links to helpful M1R KNIT tutorials where applicable
✔ Original M1R KNIT design
DIGITAL DOWNLOAD
This listing is for a DIGITAL PDF KNITTING PATTERN ONLY.
No physical product or finished knitted item will be shipped.
Your pattern will be available for digital download after purchase.
USAGE + COPYRIGHT
This knitting pattern and its instructions may not be shared, copied, reproduced, or redistributed.
Small businesses with an annual income of CAD $30,000 or less may sell finished items made from this pattern provided credit is given to M1R KNIT.
© M1R KNIT. All Rights Reserved.
PATTERN SUPPORT
Questions while knitting? I’m happy to help.
Find more knitting patterns, tutorials, and technique guides from M1R KNIT:
Website: M1RKNIT.com
YouTube: @m1rknit
Instagram: @m1rknit
Ravelry: M1R KNIT
SHARE YOUR PROJECT
I’d love to see what you make.
Tag @m1rknit when sharing your finished M1R KNIT project.
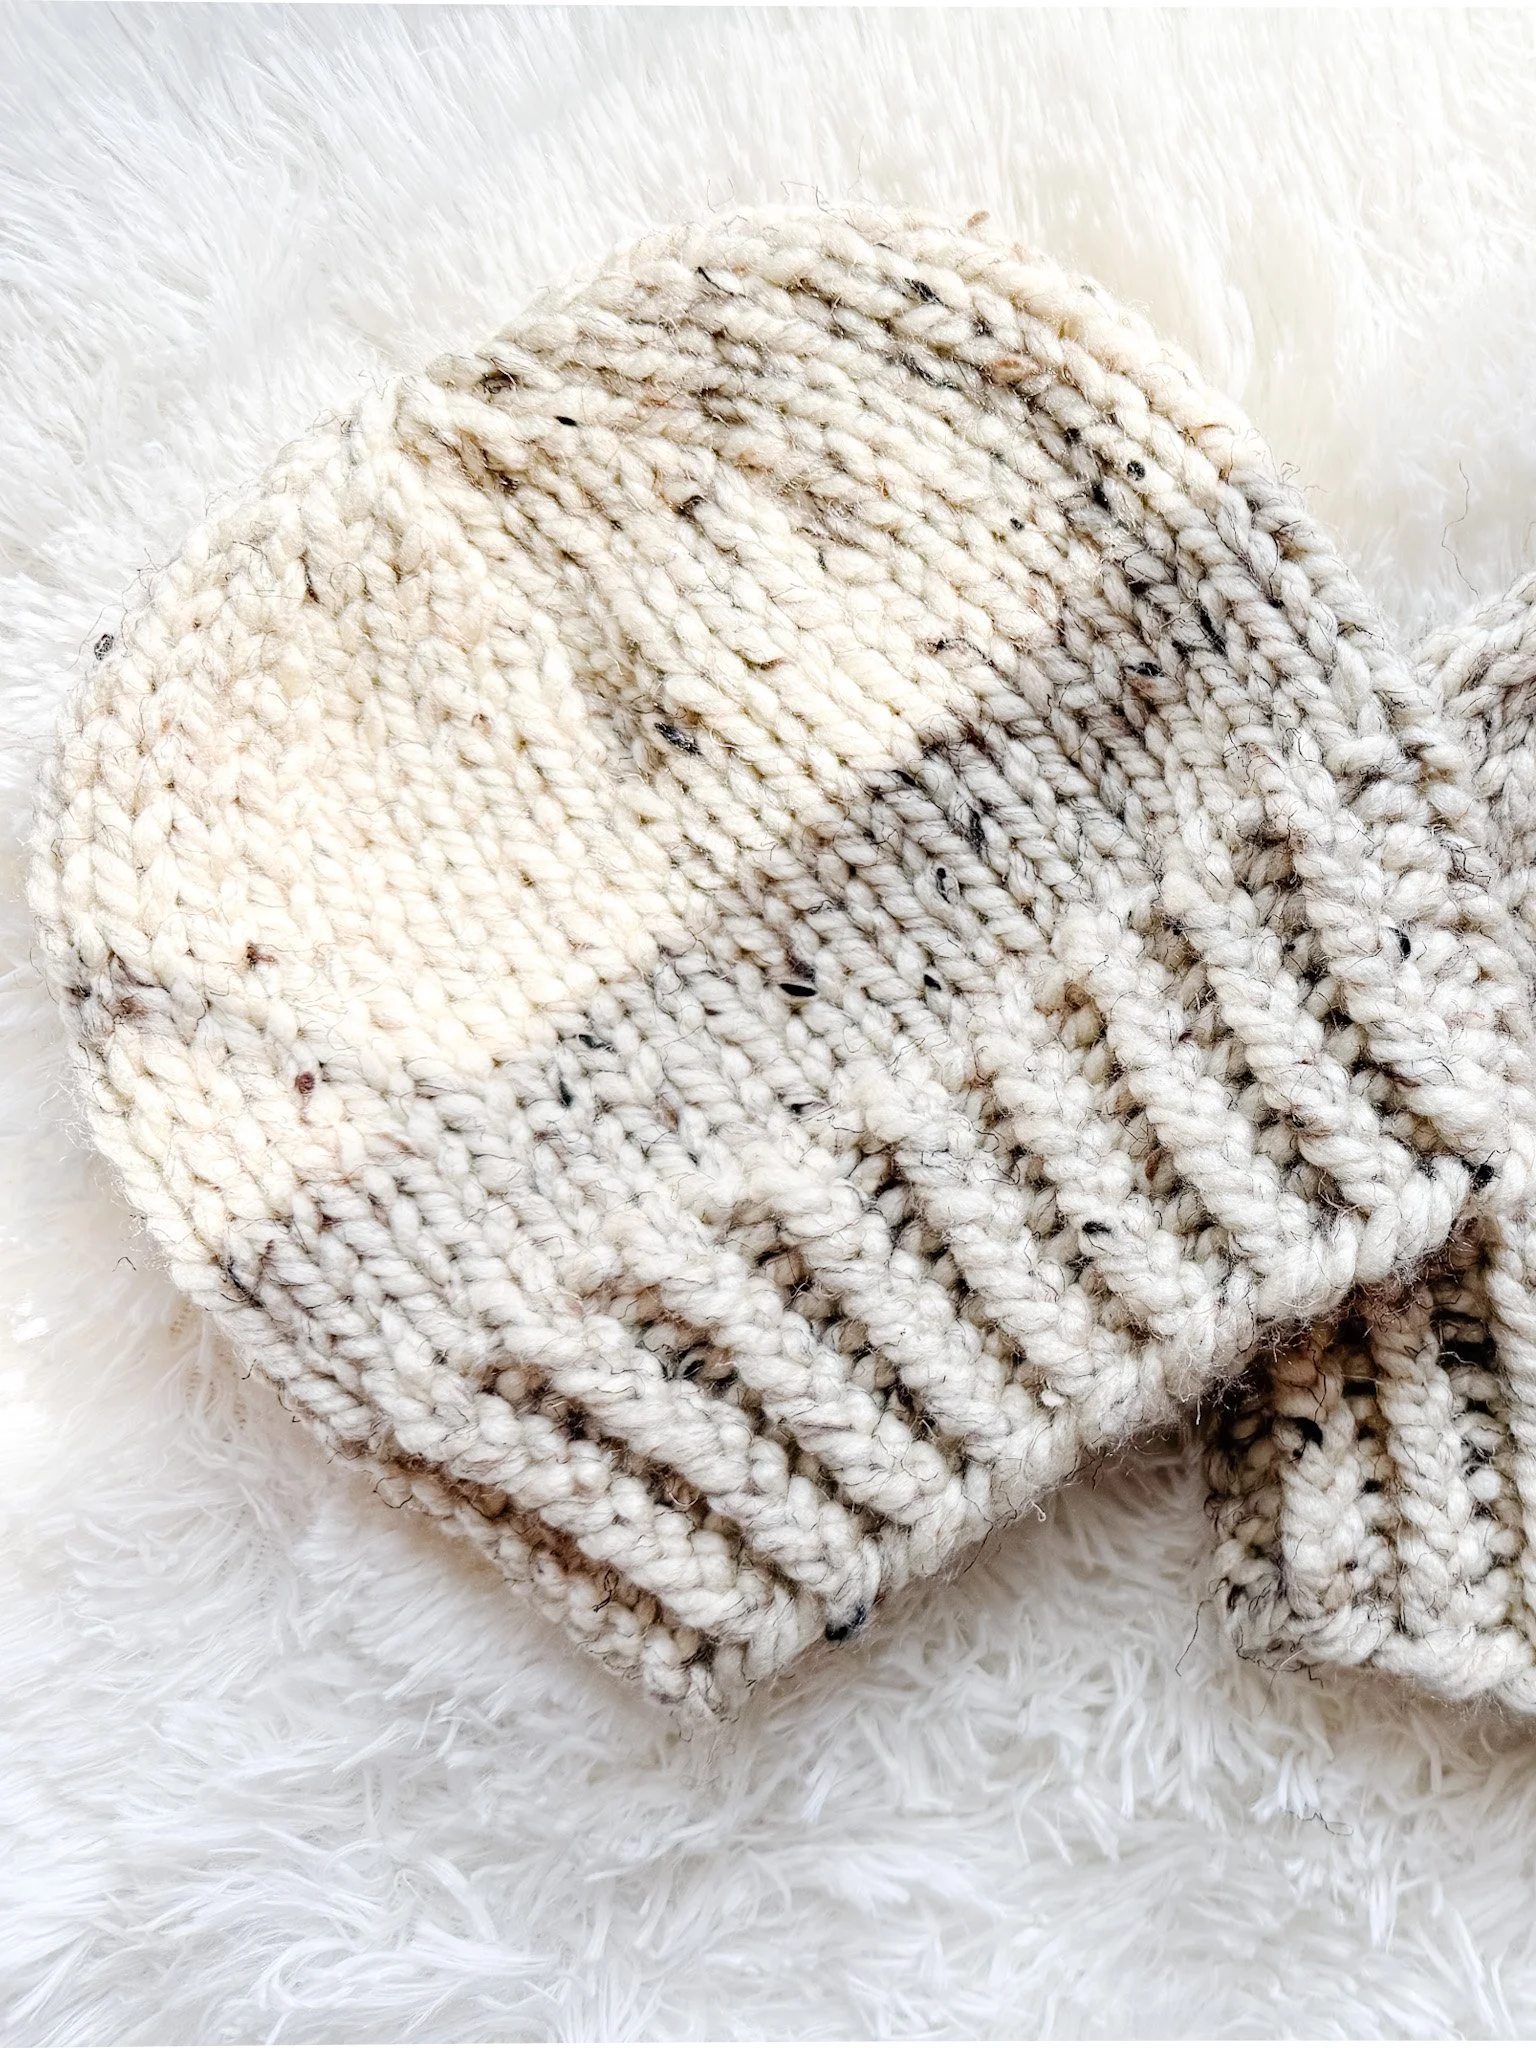
The Beanie 06 Knitting Pattern is an advanced beginner pattern for knitting a classic chunky beanie with a deep twisted-rib brim, simple stockinette body and neatly shaped crown.
Worked in super-bulky yarn, Beanie 06 is designed to be a quick, satisfying knit with a snug fit and clean, minimal look. The pattern includes two adult sizes and approximately 2–4"/5–10 cm of negative ease for a comfortable, close-fitting finish.
The downloadable PDF includes clear written instructions, sizing and finished measurements, yarn requirements, gauge information, abbreviations, a schematic and crown-shaping instructions to help you complete your project.
ABOUT THE PATTERN
Beanie 06 is worked seamlessly in the round from the bottom up, beginning with a twisted 1 × 1 rib brim.
The body is worked in stockinette stitch before simple knit-two-together decreases shape the crown. The crown can be completed using either DPNs or the magic-loop method.
Pattern Type: Beanie
Skill Level: Advanced Beginner
Construction: Bottom-up, worked seamlessly in the round
Yarn Weight: Super Bulky
Sizes: Standard and Large
SKILL LEVEL
ADVANCED BEGINNER
Watch this tutorial video here: https://youtu.be/_B8Gf6ypjh4
This pattern is suitable for knitters comfortable with:
Long-tail cast on
Knitting in the round
Knit and purl stitches
Knitting through the back loop
K2tog decreases
Crown shaping
Magic loop or DPNs
SIZES + FINISHED MEASUREMENTS
Sizes Included:
Standard
Large
Designed to Fit:
Standard: 20–22"/51–56 cm head circumference
Large: 22–24"/56–61 cm head circumference
Finished Circumference:
Standard: 17.75"/45 cm
Large: 19.5"/49.5 cm
Finished Length: Approximately 8.5"/21.5 cm
Brim Depth: Approximately 3"/7.5 cm
Recommended Ease:
Approximately 2–4"/5–10 cm of negative ease for a snug, comfortable fit.
If you are between sizes, choose the larger size for a more relaxed fit or the smaller size for a closer fit.
YARN + GAUGE
Suggested Yarn:
Lion Brand Thick & Quick, or another super-bulky yarn that achieves gauge.
Yarn Weight:
Super Bulky
Yarn Requirements:
Standard: 1 ball
Large: 1 ball
Pattern sample yarn: approximately 170 g / 97 m per ball.
Gauge:
9 stitches × 14 rounds = 4"/10 cm, blocked.
Suggested Needles:
9 mm / US 13 16"/40 cm circular needle, or size required to obtain gauge
For crown shaping:
9 mm / US 13 DPNs
or
9 mm / US 13 circular needle with approximately 40"/100 cm cable for magic loop
Notions:
Yarn needle
Beginning-of-round stitch marker
Scissors
Full yarn, needle, gauge and notion information is included in the PDF pattern.
CONSTRUCTION + TECHNIQUES
This pattern includes the following techniques:
Long-tail cast on
Knitting in the round
Twisted 1 × 1 rib
Stockinette stitch in the round
K2tog decreases
Crown shaping
Magic loop or DPN knitting
Finishing and blocking
NORWEGIAN KNITTING TUTORIALS
M1R KNIT specializes in teaching the Norwegian knitting method, a continental-style knitting technique with the working yarn held in the left hand.
You do not need to use the Norwegian knitting method to make Beanie 06. The pattern can be worked using the knitting style you are most comfortable with.
Visit the M1R KNIT YouTube channel for Norwegian knitting tutorials, beginner knitting lessons and technique demonstrations.
WHAT'S INCLUDED
✔ Complete downloadable PDF knitting pattern
✔ Step-by-step written instructions
✔ Two adult sizes
✔ Finished measurements
✔ Yarn requirements
✔ Needle and notion information
✔ Gauge information
✔ Pattern abbreviations
✔ Crown-shaping instructions for each size
✔ Finishing and blocking instructions
✔ Beanie schematic
✔ Original M1R KNIT design
DIGITAL DOWNLOAD
This listing is for a DIGITAL PDF KNITTING PATTERN ONLY.
No physical product or finished knitted item will be shipped.
Your pattern will be available for digital download after purchase.
USAGE + COPYRIGHT
This pattern may not be shared, copied, reproduced or redistributed.
Small businesses with an annual income of $30,000 CAD or less are welcome to sell finished items made from this pattern. Please credit M1R KNIT as the pattern designer.
©2026 M1R KNIT. All Rights Reserved.
PATTERN SUPPORT
Questions while knitting? I’m happy to help.
Find more knitting patterns, tutorials and technique guides from M1R KNIT:
Website: M1RKNIT.com
YouTube: @m1rknit
Instagram: @m1rknit
Ravelry: M1R KNIT
SHARE YOUR PROJECT
I’d love to see what you make.
Tag @m1rknit when sharing your finished Beanie 06 project.
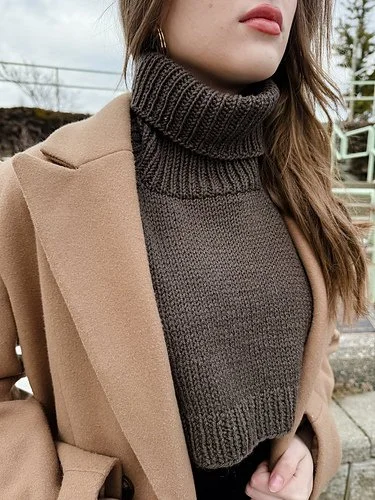
The Neck Warmer 01 Knitting Pattern is an advanced beginner pattern for knitting a classic cold-weather accessory featuring a deep roll neck, smooth stockinette body, ribbed lower edge, shaped neckline, and applied i-cord edging.
Designed to layer easily beneath coats and jackets, Neck Warmer 01 gives you the warmth and look of a turtleneck without the bulk of a full sweater. Its simple silhouette and clean finishing make it a versatile addition to a handmade wardrobe.
The downloadable PDF includes clear written instructions, finished measurements, yarn requirements, gauge information, abbreviations, pattern notes, and technique guidance to help you complete your project.
ABOUT THE PATTERN
Neck Warmer 01 is worked from the bottom up in separate front and back pieces. Both pieces begin with 1 × 1 ribbing before continuing in stockinette stitch and shaping the neckline and shoulders.
The shoulders are seamed before stitches are picked up around the neckline for the roll neck, which is worked in the round in 1 × 1 rib. Applied i-cord edging is added along both side edges for a clean, finished look.
Pattern Type: Neck Warmer / Accessory
Skill Level: Advanced Beginner
Construction: Bottom-up; front and back worked flat; shoulders seamed; roll neck worked in the round
Yarn Weight: DK
Sizes: One Size
SKILL LEVEL
ADVANCED BEGINNER
This pattern is suitable for knitters comfortable with:
Knitting and purling
Working stockinette stitch
Working 1 × 1 ribbing
Basic decreases
Working flat and in the round
Picking up and knitting stitches
Seaming shoulders
Applied i-cord edging
Stretchy bind-off techniques
SIZES + FINISHED MEASUREMENTS
Sizes Included:
One Size
Finished Measurements:
Total Length: 12"/30.5 cm
Neck Width: 9.5"/24 cm
Front Neck Depth: 2.5"/6.35 cm
Neckband Width: 9.5"/24 cm
Roll Neck Height: 8"/20 cm
YARN + GAUGE
Suggested Yarn:
Sandnes Garn Double Sunday — 3880 Dark Chocolate
Yarn Weight:
DK
Yarn Requirements:
4 skeins — 200 g/432 m
50 g/108 m per skein
Gauge:
20 stitches × 29 rows = 4"/10 cm in stockinette stitch, blocked.
Suggested Needles:
3.25 mm/US 3 needles for ribbing and applied i-cord edging
4 mm/US 6 needles for stockinette stitch, or size needed to obtain gauge
32"/81 cm circular needle
16"/40 cm circular needle
3.25 mm/US 3 DPNs for applied i-cord edging
Notions:
Yarn needle
Stitch markers
Beginning-of-round marker
Scissors
Full yarn, needle, gauge, and notion information is included in the PDF pattern.
CONSTRUCTION + TECHNIQUES
This pattern includes the following techniques:
Long-tail cast-on
1 × 1 ribbing
Stockinette stitch
Knit and purl decreases
Shaping a front and back neckline
Shoulder seaming
Picking up and knitting neckline stitches
Knitting in the round
Applied i-cord edging
Stretchy bind-off
NORWEGIAN KNITTING TUTORIALS
M1R KNIT specializes in teaching the Norwegian knitting method, a continental-style knitting technique with the working yarn held in the left hand.
You do not need to use the Norwegian knitting method to make this pattern unless specifically stated.
Where helpful, the pattern includes links to video tutorials demonstrating knitting and finishing techniques.
WHAT'S INCLUDED
✔ Complete downloadable PDF knitting pattern
✔ Step-by-step written instructions
✔ Finished measurements
✔ Yarn requirements
✔ Needle and notion information
✔ Gauge information
✔ Pattern abbreviations and technique notes
✔ Links to helpful knitting tutorials where applicable
✔ Original M1R KNIT design
DIGITAL DOWNLOAD
This listing is for a DIGITAL PDF KNITTING PATTERN ONLY.
No physical product or finished knitted item will be shipped.
Your pattern will be available for digital download after purchase.
USAGE + COPYRIGHT
This pattern may not be shared, copied, reproduced, or redistributed.
Small businesses with an annual income of $30,000 CAD or less may sell finished items made from this pattern with credit given to M1R KNIT.
© M1R KNIT. All Rights Reserved.
PATTERN SUPPORT
Questions while knitting? I’m happy to help.
Find more knitting patterns, tutorials, and technique guides from M1R KNIT:
Website: M1RKNIT.com
YouTube: @m1rknit
Instagram: @m1rknit
Ravelry: M1R KNIT
SHARE YOUR PROJECT
I’d love to see what you make.
Tag @m1rknit when sharing your finished M1R KNIT project.
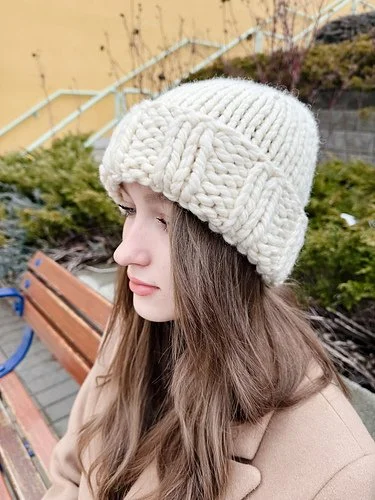
DOWNLOAD THIS PATTERN FOR FREE WHEN YOU SUBSCRIBE TO MY NEWSLETTER HERE: https://m1rknit.com/subscribe
The Beanie 03 Knitting Pattern is a beginner pattern for knitting a classic super-bulky beanie featuring a deep 2×2 ribbed brim, smooth stockinette body and simple shaped crown.
Designed for a snug, comfortable fit, Beanie 03 has a clean, modern look and plenty of warmth. Super-bulky yarn and straightforward construction make it a quick, approachable project with a polished finished result.
The downloadable PDF includes clear written instructions, sizing and finished measurements, yarn requirements, gauge information, and technique guidance to help you complete your project.
ABOUT THE PATTERN
Beanie 03 is worked seamlessly in the round from the bottom up, beginning with a 2×2 ribbed brim before transitioning to a stockinette body.
The crown is shaped with evenly spaced knit-two-together decreases to create a smooth, rounded finish. The pattern includes two adult sizes and is designed with negative ease for a close, comfortable fit.
Pattern Type: Beanie
Skill Level: Beginner
Construction: Bottom-up, worked seamlessly in the round
Yarn Weight: Super Bulky
Sizes: Standard, Large
SKILL LEVEL
BEGINNER
This pattern is suitable for knitters comfortable with:
Long-tail cast on
Knitting and purling
Working 2×2 ribbing
Knitting in the round
Working stockinette stitch in the round
K2tog decreases
Basic crown shaping
SIZES + FINISHED MEASUREMENTS
Sizes Included:
Standard
Large
Designed to Fit:
Standard: 20–22"/51–56 cm head circumference
Large: 22–24"/56–61 cm head circumference
Finished Measurements:
Standard: 18"/45.5 cm finished circumference
Large: 20"/51 cm finished circumference
Finished Length: 10.5"/26.5 cm
Brim Depth: 3"/7.5 cm
Recommended Ease:
Approximately 2–4"/5–10 cm of negative ease for a snug, comfortable fit.
If you are between sizes, choose the larger size for a more relaxed fit or the smaller size for a closer fit.
YARN + GAUGE
Suggested Yarn:
Knomad Tundra
100% Andean Highland Wool
44 yd / 100 g
Yarn Weight:
Super Bulky
Yarn Requirements:
Standard/Large: Approximately 140 g / 62 yd total
Purchase 2 × 100 g hanks.
Gauge:
8 stitches × 12 rounds = 4"/10 cm in stockinette stitch, blocked.
Suggested Needles:
9 mm / US 13 16"/40 cm circular needle, or size required to obtain gauge
For crown shaping:
9 mm / US 13 circular needle with approximately 40"/100 cm cable for magic loop, or your preferred method for working a small circumference in the round.
Notions:
Yarn needle
Stitch markers
Beginning-of-round marker
Scissors
Full yarn, needle, gauge, and notion information is included in the PDF pattern.
CONSTRUCTION + TECHNIQUES
This pattern includes the following techniques:
Long-tail cast on
Joining to work in the round
2×2 ribbing
Stockinette stitch in the round
Placing and slipping stitch markers
K2tog decreases
Crown shaping
Working a small circumference in the round
Finishing and weaving in ends
Blocking
NORWEGIAN KNITTING TUTORIALS
M1R KNIT specializes in teaching the Norwegian knitting method, a continental-style knitting technique with the working yarn held in the left hand.
You do not need to use the Norwegian knitting method to make this pattern unless specifically stated.
Where helpful, the pattern includes links to M1R KNIT video tutorials demonstrating knitting techniques using the Norwegian knitting method.
WHAT'S INCLUDED
✔ Complete downloadable PDF knitting pattern
✔ Step-by-step written instructions
✔ Two adult sizes
✔ Sizing and finished measurements
✔ Yarn requirements
✔ Needle and notion information
✔ Gauge and gauge swatch information
✔ Pattern abbreviations and technique notes
✔ Beanie schematic with finished measurements
✔ Blocking instructions
✔ Links to helpful M1R KNIT tutorials where applicable
✔ Original M1R KNIT design
DIGITAL DOWNLOAD
This listing is for a DIGITAL PDF KNITTING PATTERN ONLY.
No physical product or finished knitted item will be shipped.
Your pattern will be available for digital download after purchase.
USAGE + COPYRIGHT
© M1R KNIT. All Rights Reserved.
Pattern may not be shared, copied, or redistributed.
If you are a small business with an annual income of $30,000 CAD or less, you are welcome to sell finished items made from this pattern with credit given to M1R KNIT.
PATTERN SUPPORT
Questions while knitting? I’m happy to help.
Find more knitting patterns, tutorials, and technique guides from M1R KNIT:
Website: M1RKNIT.com
YouTube: @m1rknit
Instagram: @m1rknit
Ravelry: M1R KNIT
SHARE YOUR PROJECT
I’d love to see what you make.
Tag @m1rknit when sharing your finished M1R KNIT project.
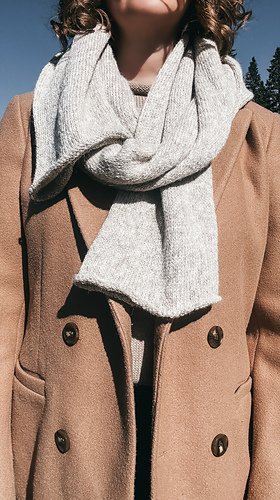
The SCARF 01 Knitting Pattern is a beginner pattern for knitting a classic tubular scarf worked seamlessly in the round in stockinette stitch.
The double-layered construction creates a simple, substantial scarf with a smooth stockinette finish and clean, minimalist look. An optional crocheted slip-stitch edging can be added to each end for a neat finished edge.
The downloadable PDF includes clear written instructions, finished measurements, yarn requirements, gauge information, abbreviations, and technique guidance to help you complete your project.
ABOUT THE PATTERN
SCARF 01 is worked seamlessly in the round from one end to the other using stockinette stitch.
The scarf is constructed as a continuous knitted tube, creating a naturally double-layered fabric without seaming. The length can easily be adjusted by working additional or fewer rounds, and an optional crochet slip-stitch edging may be added after binding off.
Pattern Type: Scarf
Skill Level: Beginner
Construction: Seamlessly worked in the round / tubular construction
Yarn Weight: DK
Sizes: One Size
SKILL LEVEL
BEGINNER
This pattern is suitable for knitters comfortable with:
Long-tail cast on
Joining knitting to work in the round
Knitting in the round
Stockinette stitch in the round
Binding off
Weaving in ends
Optional crochet slip-stitch edging
SIZES + FINISHED MEASUREMENTS
Sizes Included:
One Size
Finished Measurements:
Approximately 8" (20 cm) wide when laid flat × 84" (213 cm) long
The scarf is worked as a tube, creating a double layer of knitted fabric.
YARN + GAUGE
Suggested Yarn:
DROPS Design Sky
Yarn Weight:
DK
Suggested Colour:
02 Pearl Grey
Yarn Requirements:
6 × 50 g balls
Approximately 1,140 m / 1,247 yd total
Gauge:
21 stitches × 28 rounds = 4" / 10 cm in stockinette stitch worked in the round, unblocked.
Gauge is not critical for this scarf, although differences in gauge may affect the finished dimensions and yarn requirements.
Suggested Needles:
4 mm (US 6) circular needle, or size needed to obtain gauge
Optional:
4 mm (G-6) crochet hook for slip-stitch edging
Notions:
Stitch marker
Yarn needle
Scissors
Full yarn, needle, gauge, and notion information is included in the PDF pattern.
CONSTRUCTION + TECHNIQUES
This pattern includes the following techniques:
Long-tail cast on
Joining to work in the round
Seamless tubular construction
Stockinette stitch in the round
Binding off
Weaving in ends
Optional crochet slip-stitch edging
NORWEGIAN KNITTING TUTORIALS
M1R KNIT specializes in teaching the Norwegian knitting method, a continental-style knitting technique with the working yarn held in the left hand.
You do not need to use the Norwegian knitting method to make this pattern unless specifically stated.
Where helpful, M1R KNIT provides video tutorials demonstrating knitting techniques using the Norwegian knitting method.
WHAT'S INCLUDED
✔ Complete downloadable PDF knitting pattern
✔ Step-by-step written instructions
✔ Finished measurements
✔ Yarn requirements
✔ Needle and notion information
✔ Gauge information
✔ Pattern abbreviations and technique notes
✔ Optional crochet finishing instructions
✔ Links to helpful M1R KNIT resources where applicable
✔ Original M1R KNIT design
DIGITAL DOWNLOAD
This listing is for a DIGITAL PDF KNITTING PATTERN ONLY.
No physical product or finished knitted item will be shipped.
Your pattern will be available for digital download after purchase.
USAGE + COPYRIGHT
©2026 M1R KNIT. All Rights Reserved.
The pattern itself may not be copied, shared, reproduced, or redistributed.
Small businesses with an annual income of $30,000 CAD or less may sell finished items made from this pattern with credit given to M1R KNIT.
PATTERN SUPPORT
Questions while knitting? I’m happy to help.
Find more knitting patterns, tutorials, and technique guides from M1R KNIT:
Website: M1RKNIT.com
YouTube: @m1rknit
Instagram: @m1rknit
Ravelry: M1R KNIT
SHARE YOUR PROJECT
I’d love to see what you make.
Tag @m1rknit when sharing your finished M1R KNIT project.
5. Avoid Complicated Stitches at the Needle Transitions
In my video, I explain how I reposition my stitches when knitting mosaic colourwork to avoid having slipped stitches directly at the beginning or end of a needle.
A similar principle can be useful when working certain decreases or more complicated stitch combinations.
If you're finding that a decrease such as SSK or k2tog is difficult to work directly beside a cable transition, you can sometimes reposition the cable so those stitches sit farther from the gap. In other words, travel your cable along through different points in your stitches.
Just be careful to maintain the correct stitch order and keep track of any pattern markers or shaping locations.
6. Practice with a Simple Tube Before Starting Socks
If you're completely new to magic loop, you don't need to learn it while also learning sock construction.
Try casting on 24 stitches with smooth, light-coloured yarn and knitting a few rounds in stockinette.
This gives you an opportunity to practice moving your stitches, switching needle positions, and managing your working yarn without worrying about ribbing, heel shaping, or stitch patterns. If you’re the adventurous type, then I recommend the FORETHOUGHT Fingering Shortie Socks 02 Knitting Pattern.
Once the movements begin to feel familiar, moving on to socks or sleeves becomes much easier.
Can You Knit Colourwork Using Magic Loop?
Absolutely!
I regularly use magic loop for mosaic colourwork, including my mosaic sock designs.
The important thing is to pay attention to the positioning of your stitches and how your yarn travels between the two sections of your knitting.
With mosaic knitting, I prefer to avoid placing slipped stitches directly at the cable transitions whenever possible. This helps me manage the yarn more neatly and prevent unwanted tightness or bunching along the sides of my socks.
You can reposition your stitches along the cable to accommodate your stitch pattern, provided you maintain the correct order and placement of any shaping.
If you're interested in learning more, I also have a tutorial dedicated to knitting mosaic colourwork in the round using magic loop on my YouTube channel.
Is Magic Loop Better Than Double-Pointed Needles?
This really comes down to personal preference.
Some knitters love double-pointed needles, while others prefer the simplicity of working with one circular needle.
For me, magic loop has become my preferred method because I find it comfortable, particularly during longer knitting sessions.
I also appreciate that I can use the same circular needle for many different types of projects without needing several sets of short circulars or DPNs.
That doesn't necessarily make magic loop better for everyone, but it's certainly a technique worth learning.
Final Thoughts
Magic loop can feel a little awkward during those first few rounds, especially when you're learning how to move your stitches and reposition your needles.
But once you've practiced the movements a few times, it becomes a very straightforward way to knit in the round.
My biggest advice is to use a good flexible cable, pay attention to your tension at the needle transitions, and don't get discouraged if your first round feels a little fiddly.
If you're interested in learning more knitting techniques, including the Norwegian knitting method, sock knitting, and garment construction, you'll find plenty of tutorials on my YouTube channel.
You can also explore my original knitting patterns and tutorials at M1R KNIT.
Happy Knitting,
XO Kim
Enjoying the tutorials? You can support the channel by buying me a coffee ☕Yarn used in this tutorial and pattern can be purchased here: https://lionbrand.sjv.io/B5doOB
My fave knitting needles + notions
DIGITAL PDF KNITTING PATTERN | ENGLISH ONLY | NOT A FINISHED PRODUCT
SKILL LEVEL: Intermediate
Introducing Mosaic Socks 01, a classic cuff-down sock pattern featuring a simple mosaic colourwork motif, traditional heel-flap-and-gusset construction and a comfortable wedge toe.
Mosaic knitting creates graphic colourwork using only one colour at a time, making it a great introduction to colourwork without having to manage two working yarns across the same round.
Choose between a Shorty or Mid-Calf leg length and two colour arrangements—light or dark as your main colour—to make the design your own.
DESIGN + CONSTRUCTION
Mosaic Socks 01 are knitted from the cuff down in the round using the magic loop method.
The socks begin with a 2 x 2 ribbed cuff, followed by stockinette stitch and a mosaic colourwork section worked with slipped stitches.
The mosaic motif uses an 8-stitch repeat and traditional mosaic charting, where each horizontal chart row represents two rounds. Only one colour is worked at a time.
After the leg, the sock is completed with:
Slip-stitch heel flap
Short-row heel turn
Picked-up gusset stitches
Gusset decreases
Stockinette foot
Wedge toe
Kitchener stitch finish
The pattern includes both written mosaic instructions and colourwork charts, including options for using either the light or dark yarn as your main colour.
VIDEO TUTORIALS
M1R KNIT tutorials are available to help you work through the main techniques used in this pattern.
Mosaic Colourwork in the Round Tutorial:
https://m1rknit.com/tutorials/knit-mosaic-colorwork-in-the-round-with-these-easy-steps
Heel Flap + Gusset Sock Tutorial:
https://m1rknit.com/tutorials/heel-flap-and-gusset-sock-tutorial
The tutorials demonstrate the Norwegian knitting method, but the written pattern can be followed using your preferred knitting style.
WHAT'S INCLUDED
Your purchase includes a downloadable PDF knitting pattern featuring:
Complete written knitting instructions
Adult sizes S (M, L)
Finished sock measurements
Yarn requirements and recommended materials
Needle sizes and gauge information
Size-selection and negative-ease guidance
Mosaic colourwork instructions
Written instructions for the mosaic motif
Two mosaic colour charts
Pattern abbreviations and technique notes
Heel-flap-and-gusset instructions
Kitchener stitch instructions
Video tutorial links
Shorty and Mid-Calf leg-length options
SIZES + FINISHED MEASUREMENTS
Sizes: Adult S (M, L)
Designed to fit foot circumference:
Small: approx. 7" (18 cm)
Medium: approx. 8" (20.5 cm)
Large: approx. 9" (23 cm)
Finished sock circumference:
Small: approx. 6¼" (16 cm)
Medium: approx. 7⅛" (18 cm)
Large: approx. 8" (20.5 cm)
The pattern includes instructions for adjusting the foot length to your desired finished measurement.
YARN
Recommended Yarn: Filcolana Arwetta
Yarn Weight: Fingering
Yarn Specifications: 50 g / 210 m per skein
Sample Colours: #956 and #977
Yarn Requirements — all sizes:
Main Colour (MC): 2 skeins
Contrast Colour (CC): 1 skein
Suggested substitutions include Lang Jawoll and DROPS Fabel.
SUGGESTED KNITTING NEEDLES
Main Needle:
2.25 mm (US 1) circular needle with a 32" (81 cm) cable for magic loop, or needle size required to obtain gauge.
Mosaic Colourwork:
2.5 mm (US 1.5) circular needle with a 32" (81 cm) cable, or approximately one needle size larger than your main needle if needed to keep the mosaic colourwork relaxed.
GAUGE
36 sts × 44 rnds = 4" (10 cm) in stockinette stitch, worked in the round and unblocked.
Approximately 9 sts per inch.
Use whatever needle size is required to obtain the correct gauge.
ADDITIONAL MATERIALS
Yarn needle
Stitch markers
Waste yarn
Scissors
COPYRIGHT + DISCLAIMER
©2026 M1R KNIT. All Rights Reserved.
This original knitting pattern is protected by copyright. By purchasing this digital pattern, you receive permission to use the instructions for your own knitting projects, subject to the applicable terms of purchase.
1. KNITTING SKILLS + INSTRUCTIONS
This pattern assumes the knitter has the skills appropriate to the stated difficulty level and a basic understanding of written knitting instructions.
Skills used include:
Working in the round
2 x 2 ribbing
Stockinette stitch
Mosaic colourwork
Reading a mosaic chart
Slipping stitches purlwise
Slip-stitch heel flap
Short-row heel turn
Picking up stitches
Gusset decreases
Kitchener stitch
Where provided, accompanying M1R KNIT video tutorials demonstrate the techniques and construction covered in the tutorial. They are intended to complement the written pattern and may not cover every size, modification or knitting technique.
2. PATTERN MODIFICATIONS + CUSTOMIZATION
This pattern includes instructions for the sizes, materials and construction methods specified in the PDF.
Any modifications, including changes to sizing, stitch counts, construction, gauge, yarn substitutions or colourwork placement, are undertaken at the knitter's discretion.
M1R KNIT does not provide custom pattern alterations, individualized sizing or pattern rewrites. Support for modifications outside the published instructions is not included with your purchase.
3. GAUGE + INDIVIDUAL RESULTS
Finished measurements and yarn requirements are based on the gauge and materials specified in the pattern.
Individual knitting tension, yarn substitutions, blocking methods and personal modifications may affect the finished size, appearance, yarn consumption and fit of your project.
Customers are responsible for checking gauge and determining whether their chosen materials are suitable.
4. PATTERN SUPPORT
Questions regarding possible errors or clarification of the original written instructions may be directed to hello@m1rknit.com.
Pattern support is limited to the published design and instructions. General knitting lessons, custom alterations, individualized instruction and support for modified patterns are not included with purchase.
Additional knitting education and technique demonstrations are available through the M1R KNIT YouTube channel and website.
5. COPYRIGHT + PERMITTED USE
The original written instructions, charts, illustrations, photographs and other copyright-protected material included in this pattern may not be reproduced, distributed, republished, uploaded, shared or resold without written permission from M1R KNIT, except as permitted by applicable law.
This includes unauthorized distribution of the PDF, screenshots, photographs of pattern pages and copies of the written instructions.
M1R KNIT photographs and promotional images may not be used to advertise or sell finished knitted items without permission.
SELLING FINISHED ITEMS
©2026 M1R KNIT. All Rights Reserved.
If you are a small business with an annual income of $30,000 CAD or less, you are welcome to sell finished items you personally knit from this pattern. Please credit M1R KNIT as the pattern designer.
Every effort has been made to produce accurate and complete instructions. M1R KNIT cannot be responsible for variations resulting from individual knitting tension, yarn substitutions, modifications, human error or typographical mistakes.
6. LIABILITY
M1R KNIT is not responsible for additional material costs or variations in finished results arising from individual knitting techniques, yarn substitutions or modifications made outside the published instructions.
Nothing in these terms limits any rights or remedies that cannot legally be excluded under applicable law.
7. DIGITAL DOWNLOAD + REFUND POLICY
This listing is for a digital PDF knitting pattern only. No physical product or finished knitted item will be shipped.
Your pattern will be available for digital download after purchase.
Due to the digital nature of this product, all sales are final. Refunds, returns and exchanges are not offered after purchase, except where required by applicable law.
Please review the pattern details, sizing, skill level and materials before purchasing.
Read the complete M1R KNIT Digital Product Refund Policy.
SHARE YOUR PROJECT
I'd love to see your colour choices and finished Mosaic Socks!
Tag @m1rknit on Instagram or YouTube when sharing your finished project.
Find more knitting patterns and tutorials at m1rknit.com.
Happy knitting!
M1R KNIT